No guarantees are given or implied as to the suitability of this material for any purpose whatsoever.
© July 19, 2003
This page will constantly be under construction, as will the Rod !!!
On another page, I showed how I made the top for a 3 piece hood, for my Hotrod. This page will show a method I used for making the side panels.
The sides were started by tracing the outline of an original side panel, onto a piece of 0.9mm steel. The top of the tracing was made a little higher, to allow for later cutting to height. Having access to a guillotine made the job easier, but careful work with a sharp metal cutting blade, in a jigsaw, would be another method.
It should be noted that the front and rear ends of the side panel differ in shape on an A model Ford. The front is straight, while the rear edge has a slight curve, so that it fits to the cowl correctly, when mounted. The side panel ends up with a slight twist, the rear bottom edge being further inwards than the front edge.
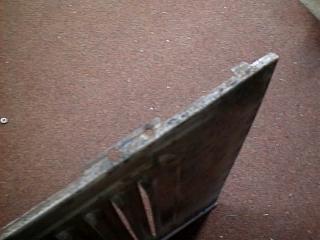
A 12mm (about 1/2") right angle was bent on the bottom of the panel. This will later be used to take guide pins, to allow easy fitting to the car. The original style hood catches will not be used.
After the hood top was fitted correctly, measurements were made to find the height of each side, measuring at the front and rear of the panels. Don't assume that both sides will be the same! Mine are slightly different from side to side. Measure many times, as once you make the final cut, there's no going back ! Allowance for a top fold was also made, before cutting. This top fold is again about 12mm and will fit over the top of the side bars. Accuracy is important, as is allowance for the folds, otherwise the panel will not fit. I certainly agonized for a while before I made the cuts.
That's all that is required to make "flat" sides. If any kind of side vent or other decoration is required, than it will need to be done also. The only other requirement, is to decide on how to retain the side panels. There are a number of methods used. They can be screwed to the side rail on the top fold, using countersunk bolts or Dzus 1/2 turn fasteners can be fitted. Other methods are bound be available. The bottom is normally fitted by tapered pins on the side panels, fitting into holes in the chassis or suitable brackets.
The pins could be made simply by grinding or turning a suitable stainless steel bolt to a slight taper. These pins would be welded into the bottom folded edge. Or, the pins can be mounted to the chassis area and slots made in a bracket, fixed to the bottom of the side panel.
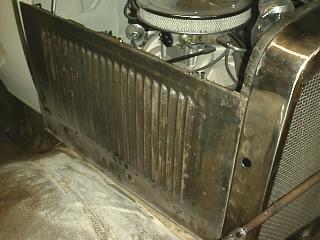
The decorative side vents, shown here on the new panels proved difficult to make, due to the process I used.
On reflection, I decided that my Coupe would look better with the original sides fitted, as it is a non chopped, more original body styled Hotrod. So, I re worked the original sides by removing the tubed hinge sections and then folding the top over at right angles. This edge was then drilled and a simple tool made to "countersink" the holes. The metal is quite thin and a normal countersink drill would result in a very thin section. The tool simply formed a countersink by hammering in a ground piece of round steel into the hole. The hole is made smaller than actually required, as the forming process opens it up.
Later, I may finish off the vented sides in case I change my mind!
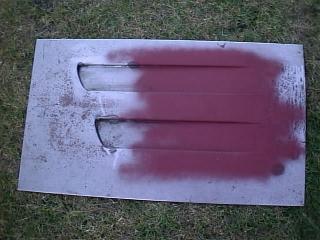
New side, made with vents and a bit of primer, to see how it will look.! (Distortion is from the camera)
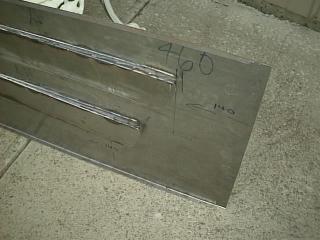
Inside view of panel with folds at top and bottom. The vents were made by hammer forming an edge in the panel, then folding up a "U" shaped piece for the inside of the vent. The front opening is about 3/4" wide. Careful trimming of both pieces was made on an angle, then they were welded together.
This is the tricky part, as lots of distortion results from all the heat produced.
From looking around on the Web, it seems a better idea is to make the actual vent with a small flange around the edge, then spot weld it to the larger panel, with the vent hole cut in it. Then, lead load the edges. Ferrari did it this way apparently.