Tony, G4LFU's 'Porta Combo' PICASTAR & Linear Amp. build.
Last updated on September 9, 2017
--------------------------------------------
(edited by vk3pe, removed content not relevant) UPDATE ON LINEAR AMP AUG 2017
Hi Glenn,
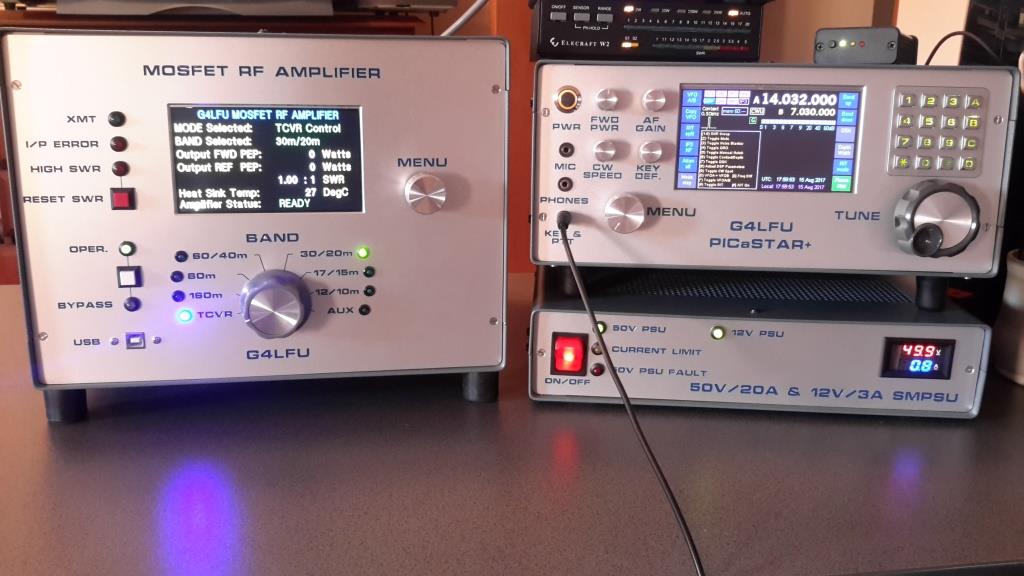
It really does work well. It's capable of 1kW (4 x VRF2933's) but limited by the 50V PSU at 20A (about 700W most bands). That means at the UK limit of 400W it's just 'ticking over'!
The Arduino MEGA and the TFTA both work great and seem to be immune to RFI after I added a #43 ferrite to each end of the I2C line. Anyway I have not had a recurrence of the corrupted font file since I changed the power supply arrangement for the TFTA. But it's comforting to know that I can use the Tera Term program if I need it without having to take things to bits.
The 'menu' encoder is a work in progress - I want to show calibration data on a separate screen if I can get it to work.
So, I am very pleased with this project and really enjoy using it with my C2a Picastar. I rebuilt that star with the amp in mind, so that it has only the 20W pa. That means that I can't overdrive the amp using that rig. (The amp has 7dB of attenuation on the input, and also some input protection - but it's nice to play it safe!)
<later>
Yes you can put my pictures on your builders pages. I will attach a few more to this mail taken during the build, if they are of interest. You can also take down the information for the earlier version of my amp (based on 4 x MRF150) as I changed horses mid-stream and readers might get a bit confused. Anyway, you recall that I was sent a matched set of four VRF2933 from a guy in the states as a 'gift' after we got chatting about amps in a QSO. (Dick/K4XU). So, I didn't buy them. I've also sent him news that the Amp is finished - he's impressed!
I did buy the PA board, less the MOSFETS. I got it and the protection boards and kits from some guys in Russia at EB104.ru and I am very pleased with them. (I think it's run by a group of guys at a club R3KBO - but I could be wrong.
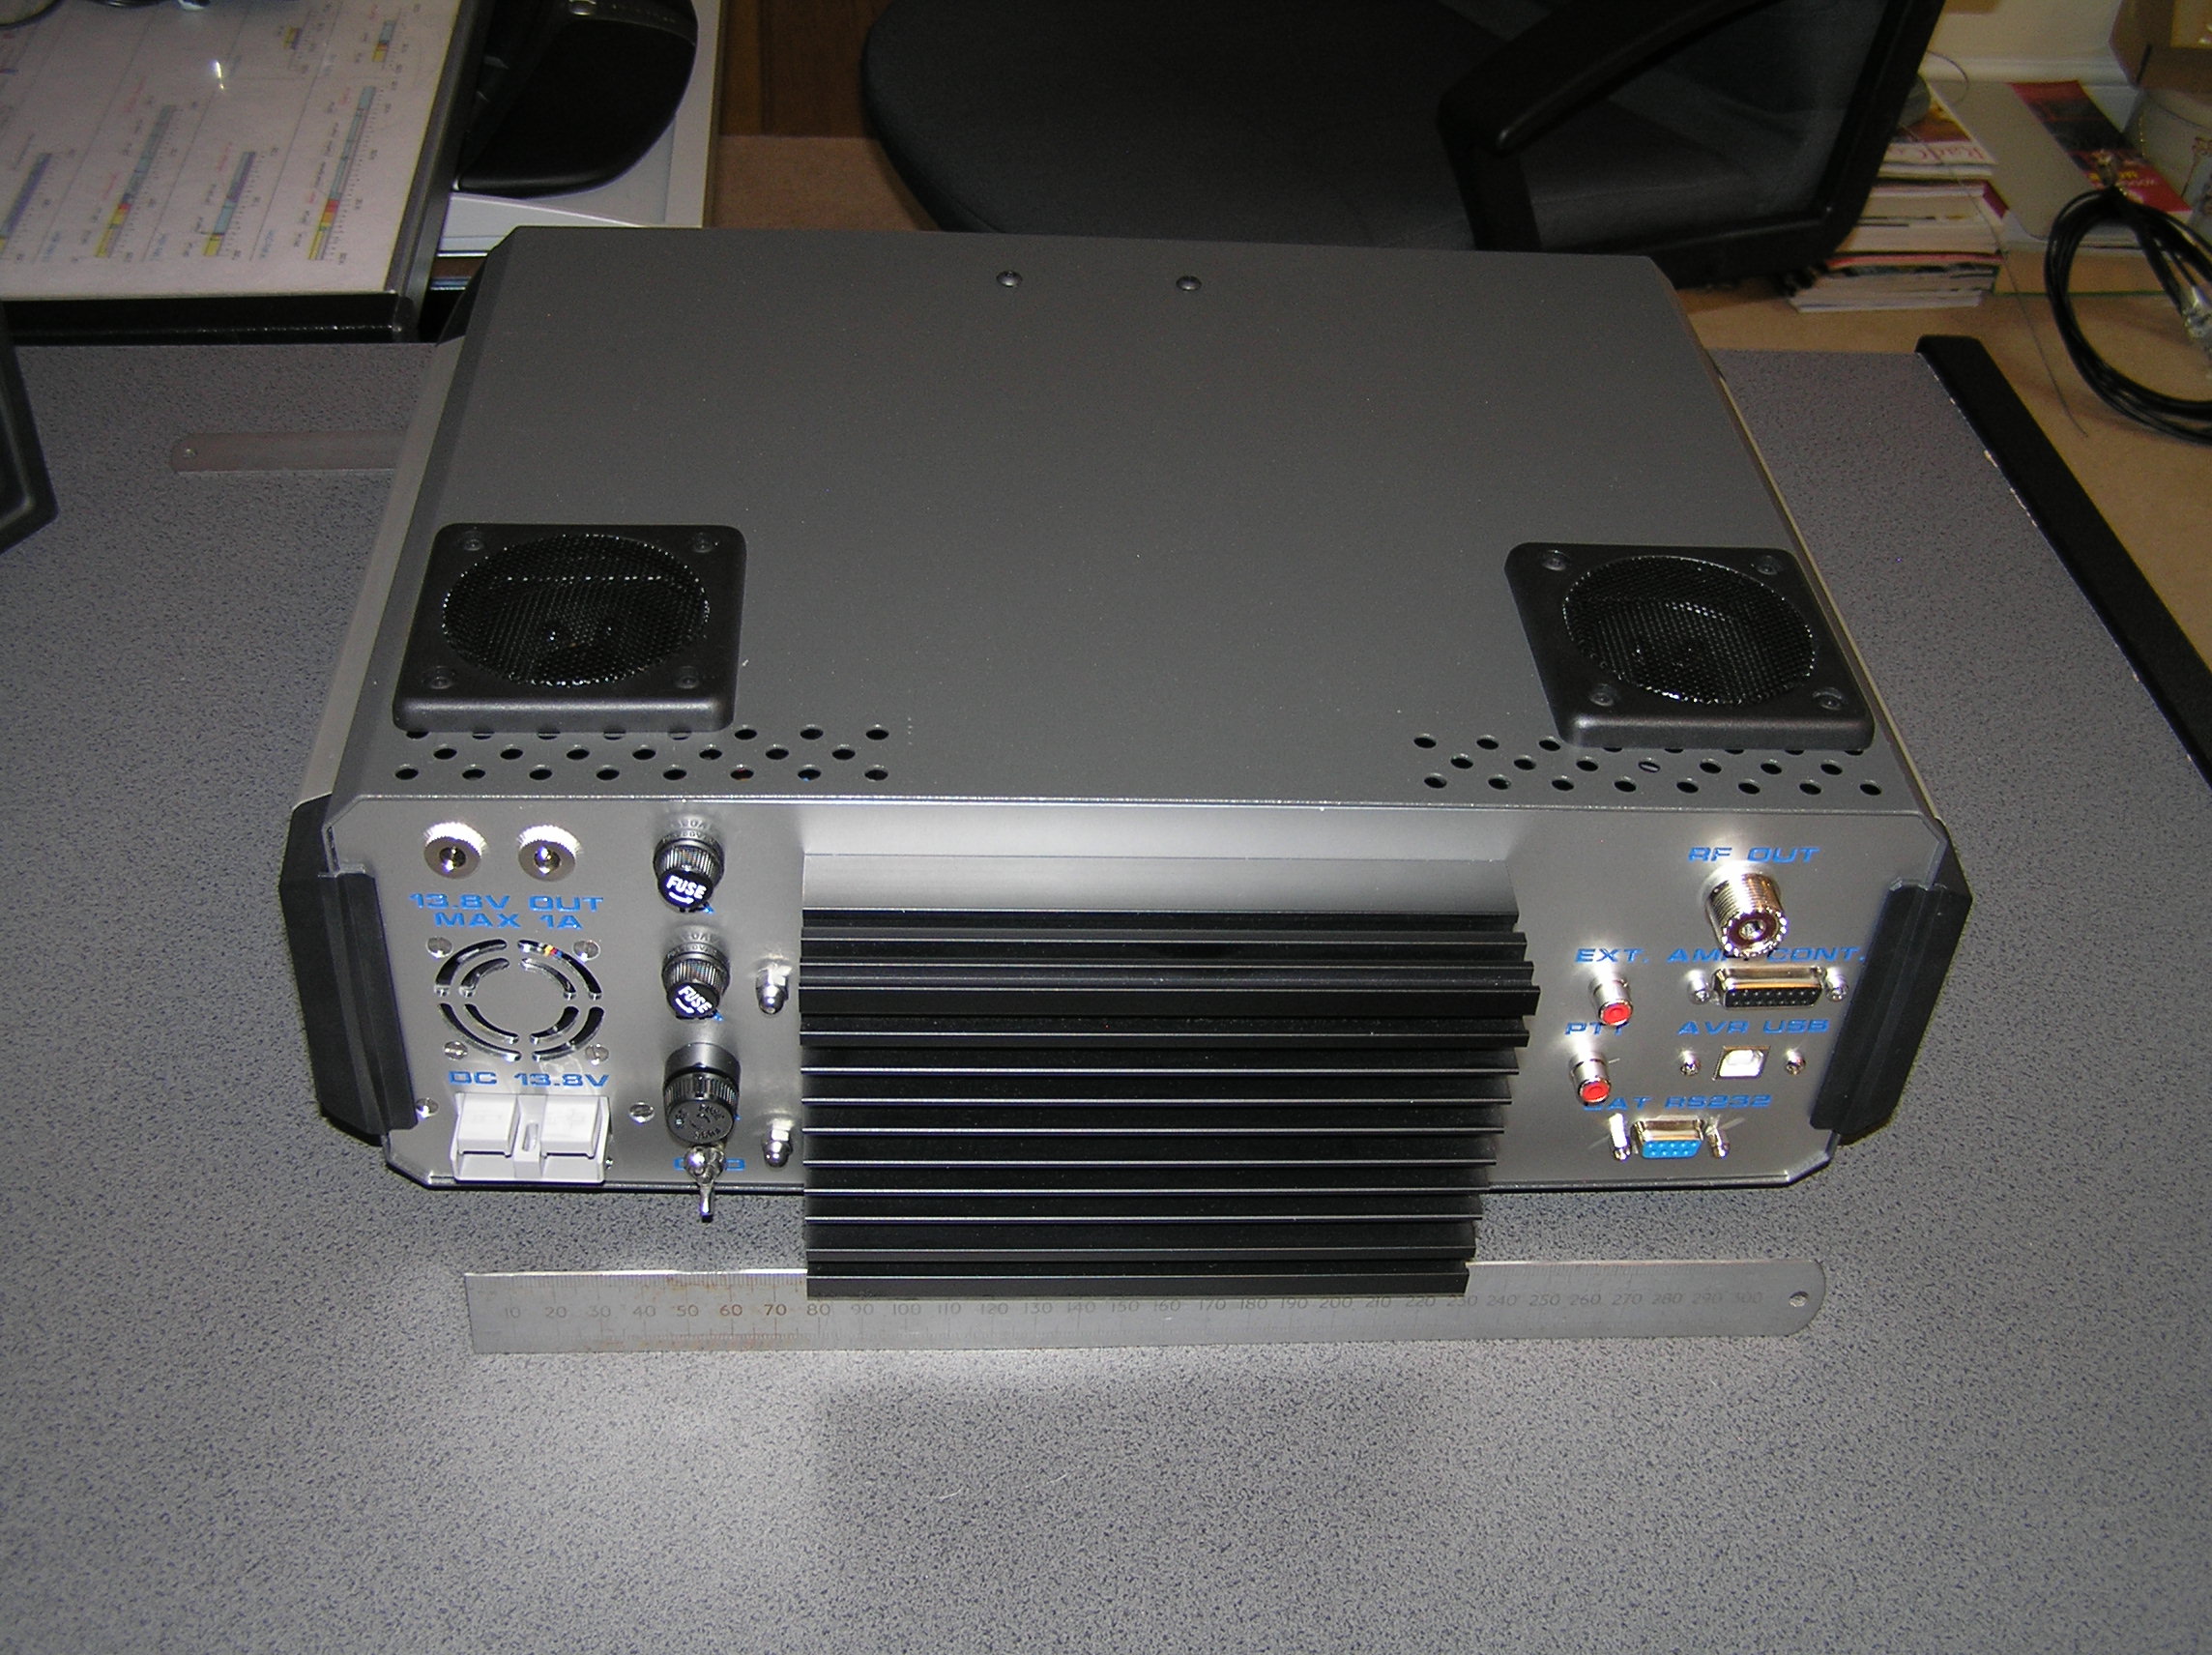
The fan arrangement on the Star was machine cut by the company that makes the panels. It's one of their standard options in the design software. I've said before that I'm hopeless with metalwork. I used the original case panel as a backing support for my engraved panels because the case panels were wrapped round at the edges and top/bottom to secure them to the case. So, it was easier just to bolt a new panel on the front.
So, that's another project put to bed. I have a few more things on the bench, including a Star fully built on your BB boards that needs a case, and a set of your P2a boards new and unused that I bought from a guy here in the UK (I think he was a bit daunted by the project!). I'm not sure that they'll ever get built - but you never know!
Keep in touch Glenn, and keep churning out the homebrew!
Best Regards
73 de Tony G4LFU
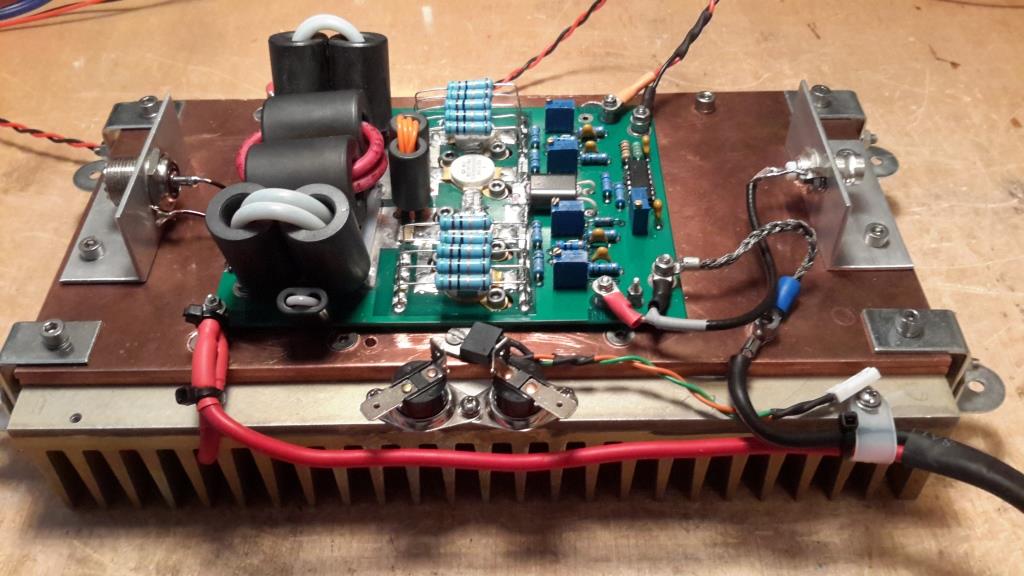
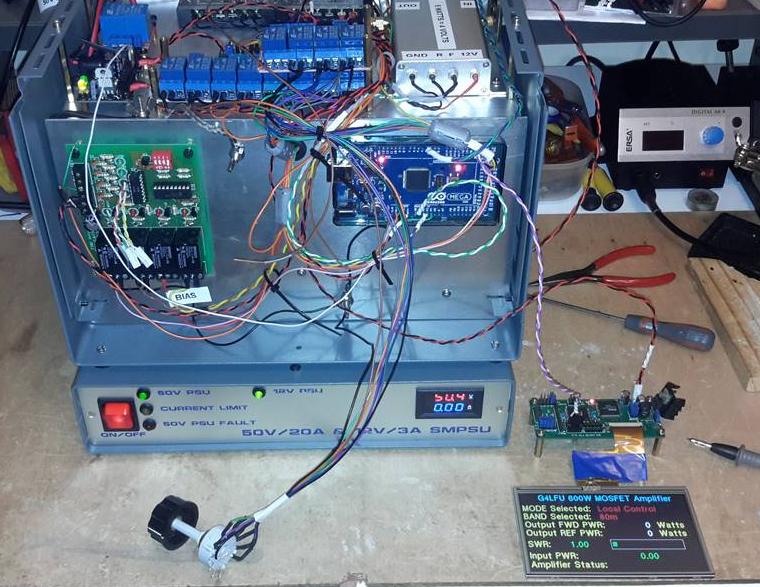
The business end...... cabling etc:-
--------------------------------------------
Jan, 2015: Tony, G4LFU, never sleeps it seems! Always a project or two on the go. While not strictly Picastar building, it certainly shows Tony's talents and I think is of interest to all Star builders. <vk3pe>
Over to Tony:-see above for current Linear Amp build.
"My 600W Mosfet RF amplifier is based on the Motorola EB104 design (4 x MRF150's) with control and protection provided by auxiliary modules from various sources, including an Arduino Mega board.
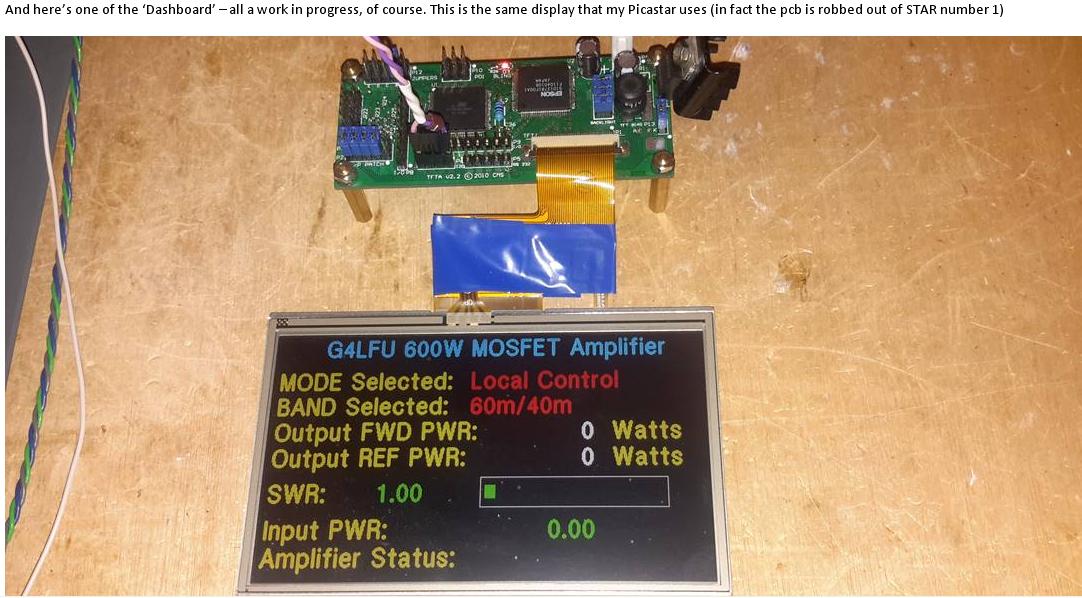
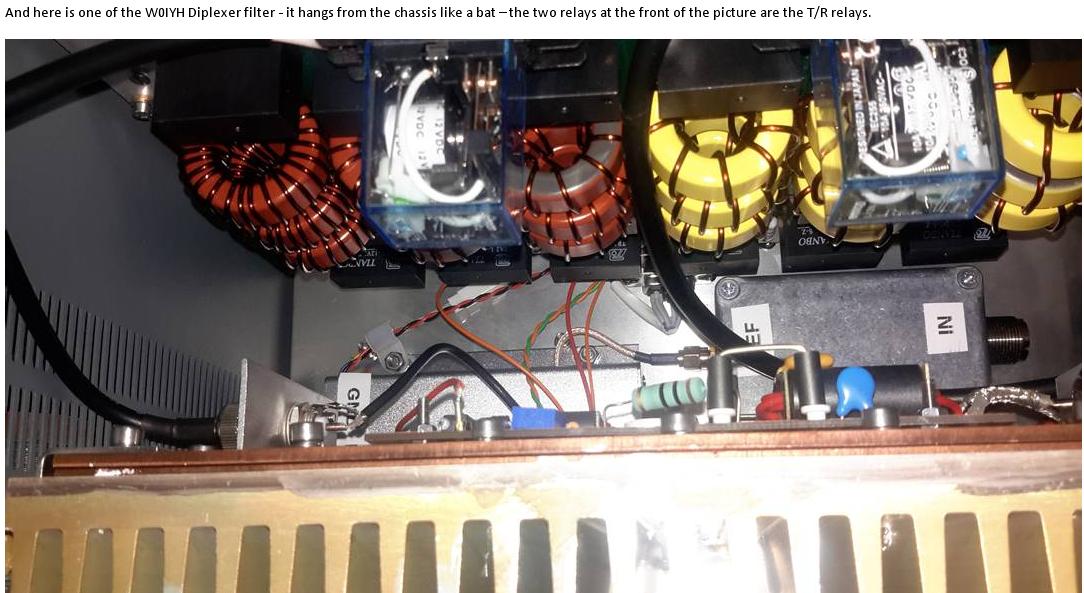
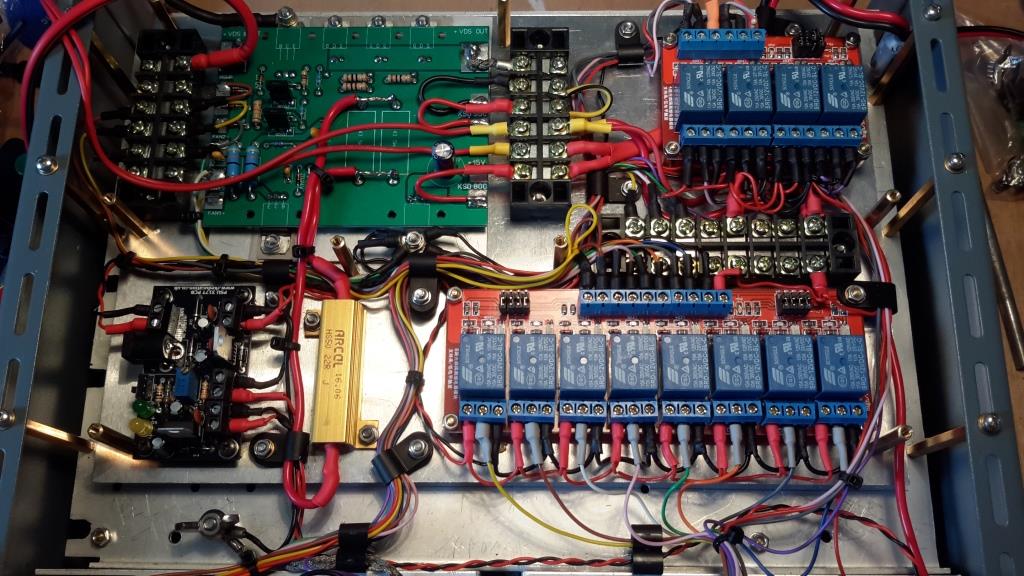
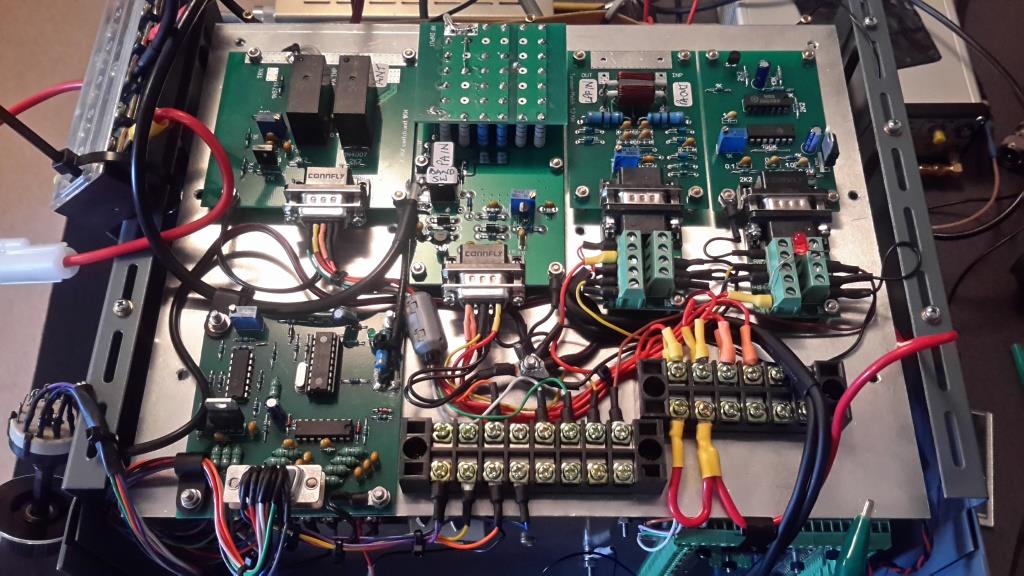
It's a 'work in progress'. I got the pcb and some of the parts for the EB104 from Communication Concepts in the US. I've built a 1kW W0IYH diplexer filter on a PCB supplied by UA3QLC. At present the Arduino is simply doing number crunching and providing information for the display, and isn't doing much in the way of control. There is a menu encoder to change the page on the display. The display is the same as is used on my Picastar - PCB and Arduino software Library by Gerard/VK3CG with some assistance from VK3PE!.
The display communicates with an Arduino via I2C. The amp interfaces with my Picastar via a PCA9555 (PCB by VK3PE!) which takes the I2C output from the STAR AVR board via a relay interface (eBay) in the amp, so that the band of the diplexer filter/display changes with the Picastar. Alternatively, the amp can be operated in 'Local Control' through the Band Switch. A pic based sequencer looks after some of the timing issues. (Radcom/G1MFG article Aug 2012). Input power is monitored via a modified G3VPX power bridge (PCB by VK3PE!) and input protection is via a voltage comparator (eBay) which trips the sequencer.
Output power is monitored via a Directional Coupler which feeds into another modified G3VPX power/SWR bridge (PCB by VK3PE!).
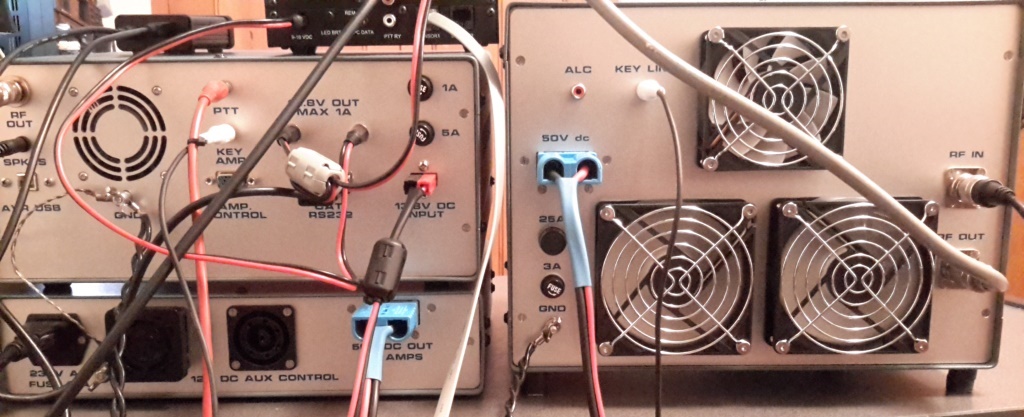
An LM35DT is pinned to the heatsink to let Arduino know what the temperature is, and to control the cooling fans. The 50V PSU is actually an Eltek 1kW SMPSU which I've re-housed. There's also a 12V psu in the same box.
I'll send more photos when it's finished."
Tony, G4LFU
PICASTAR.... Updated, 16th October, 2013 (scroll down)
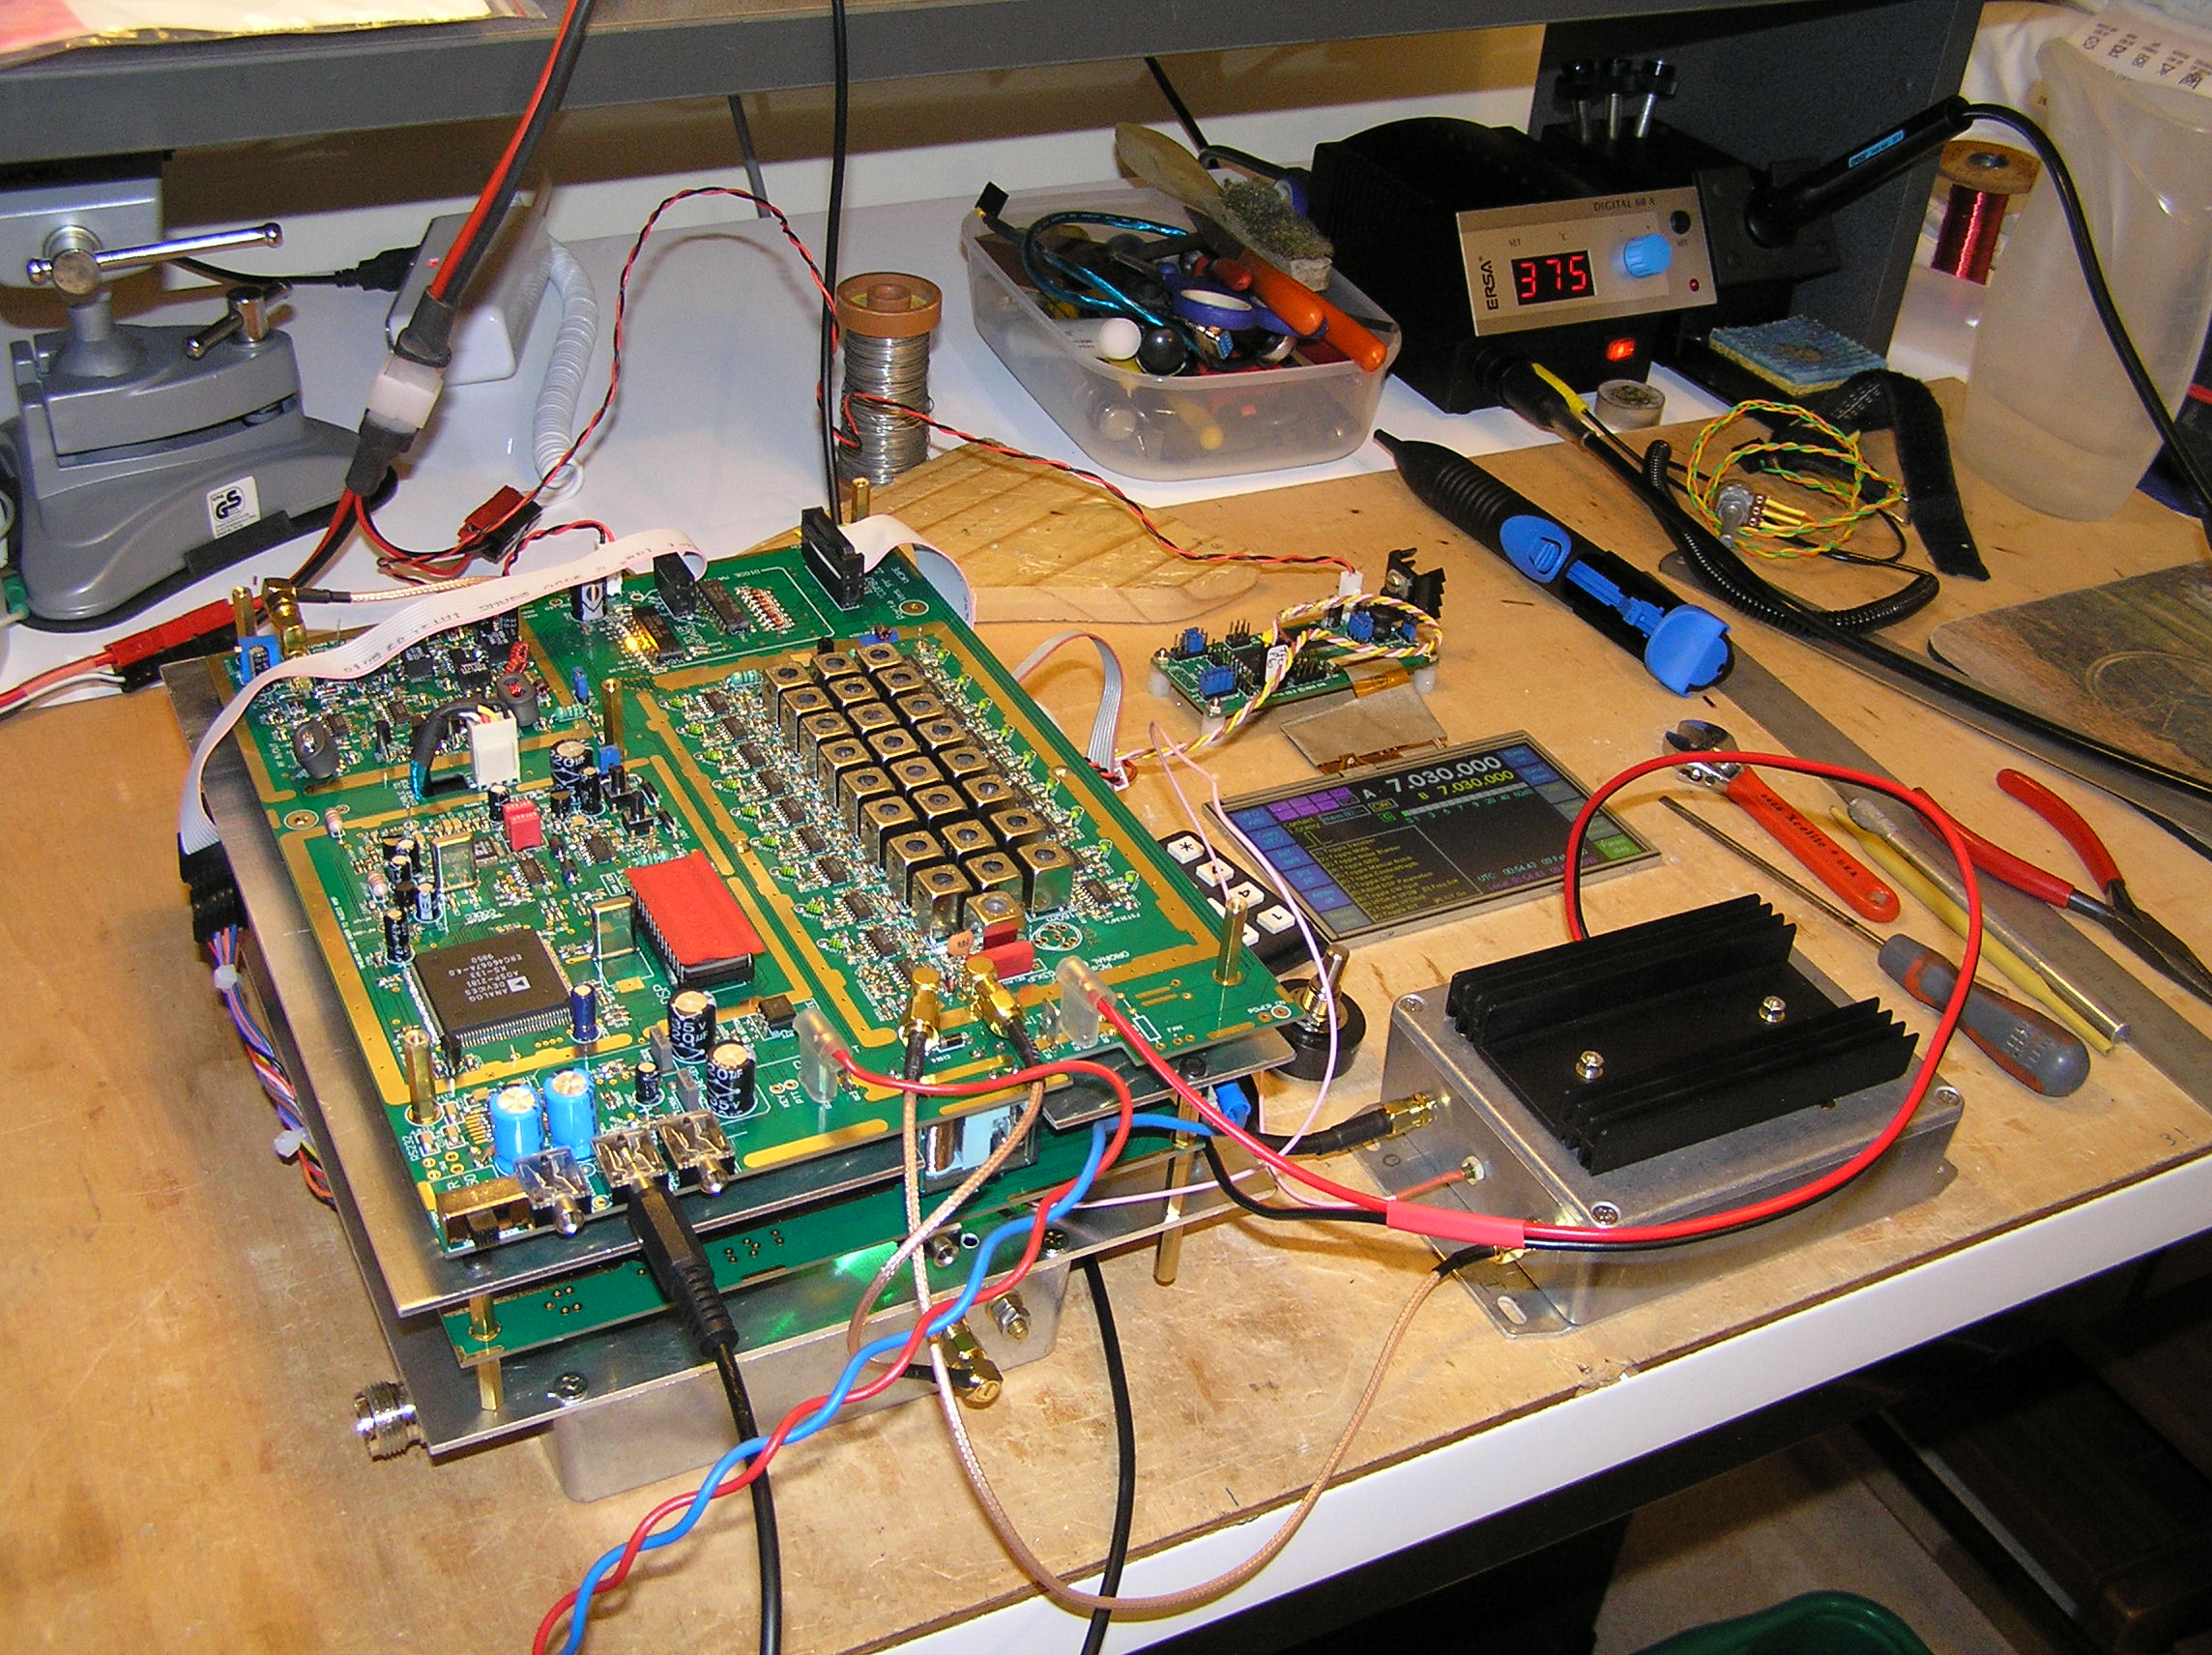
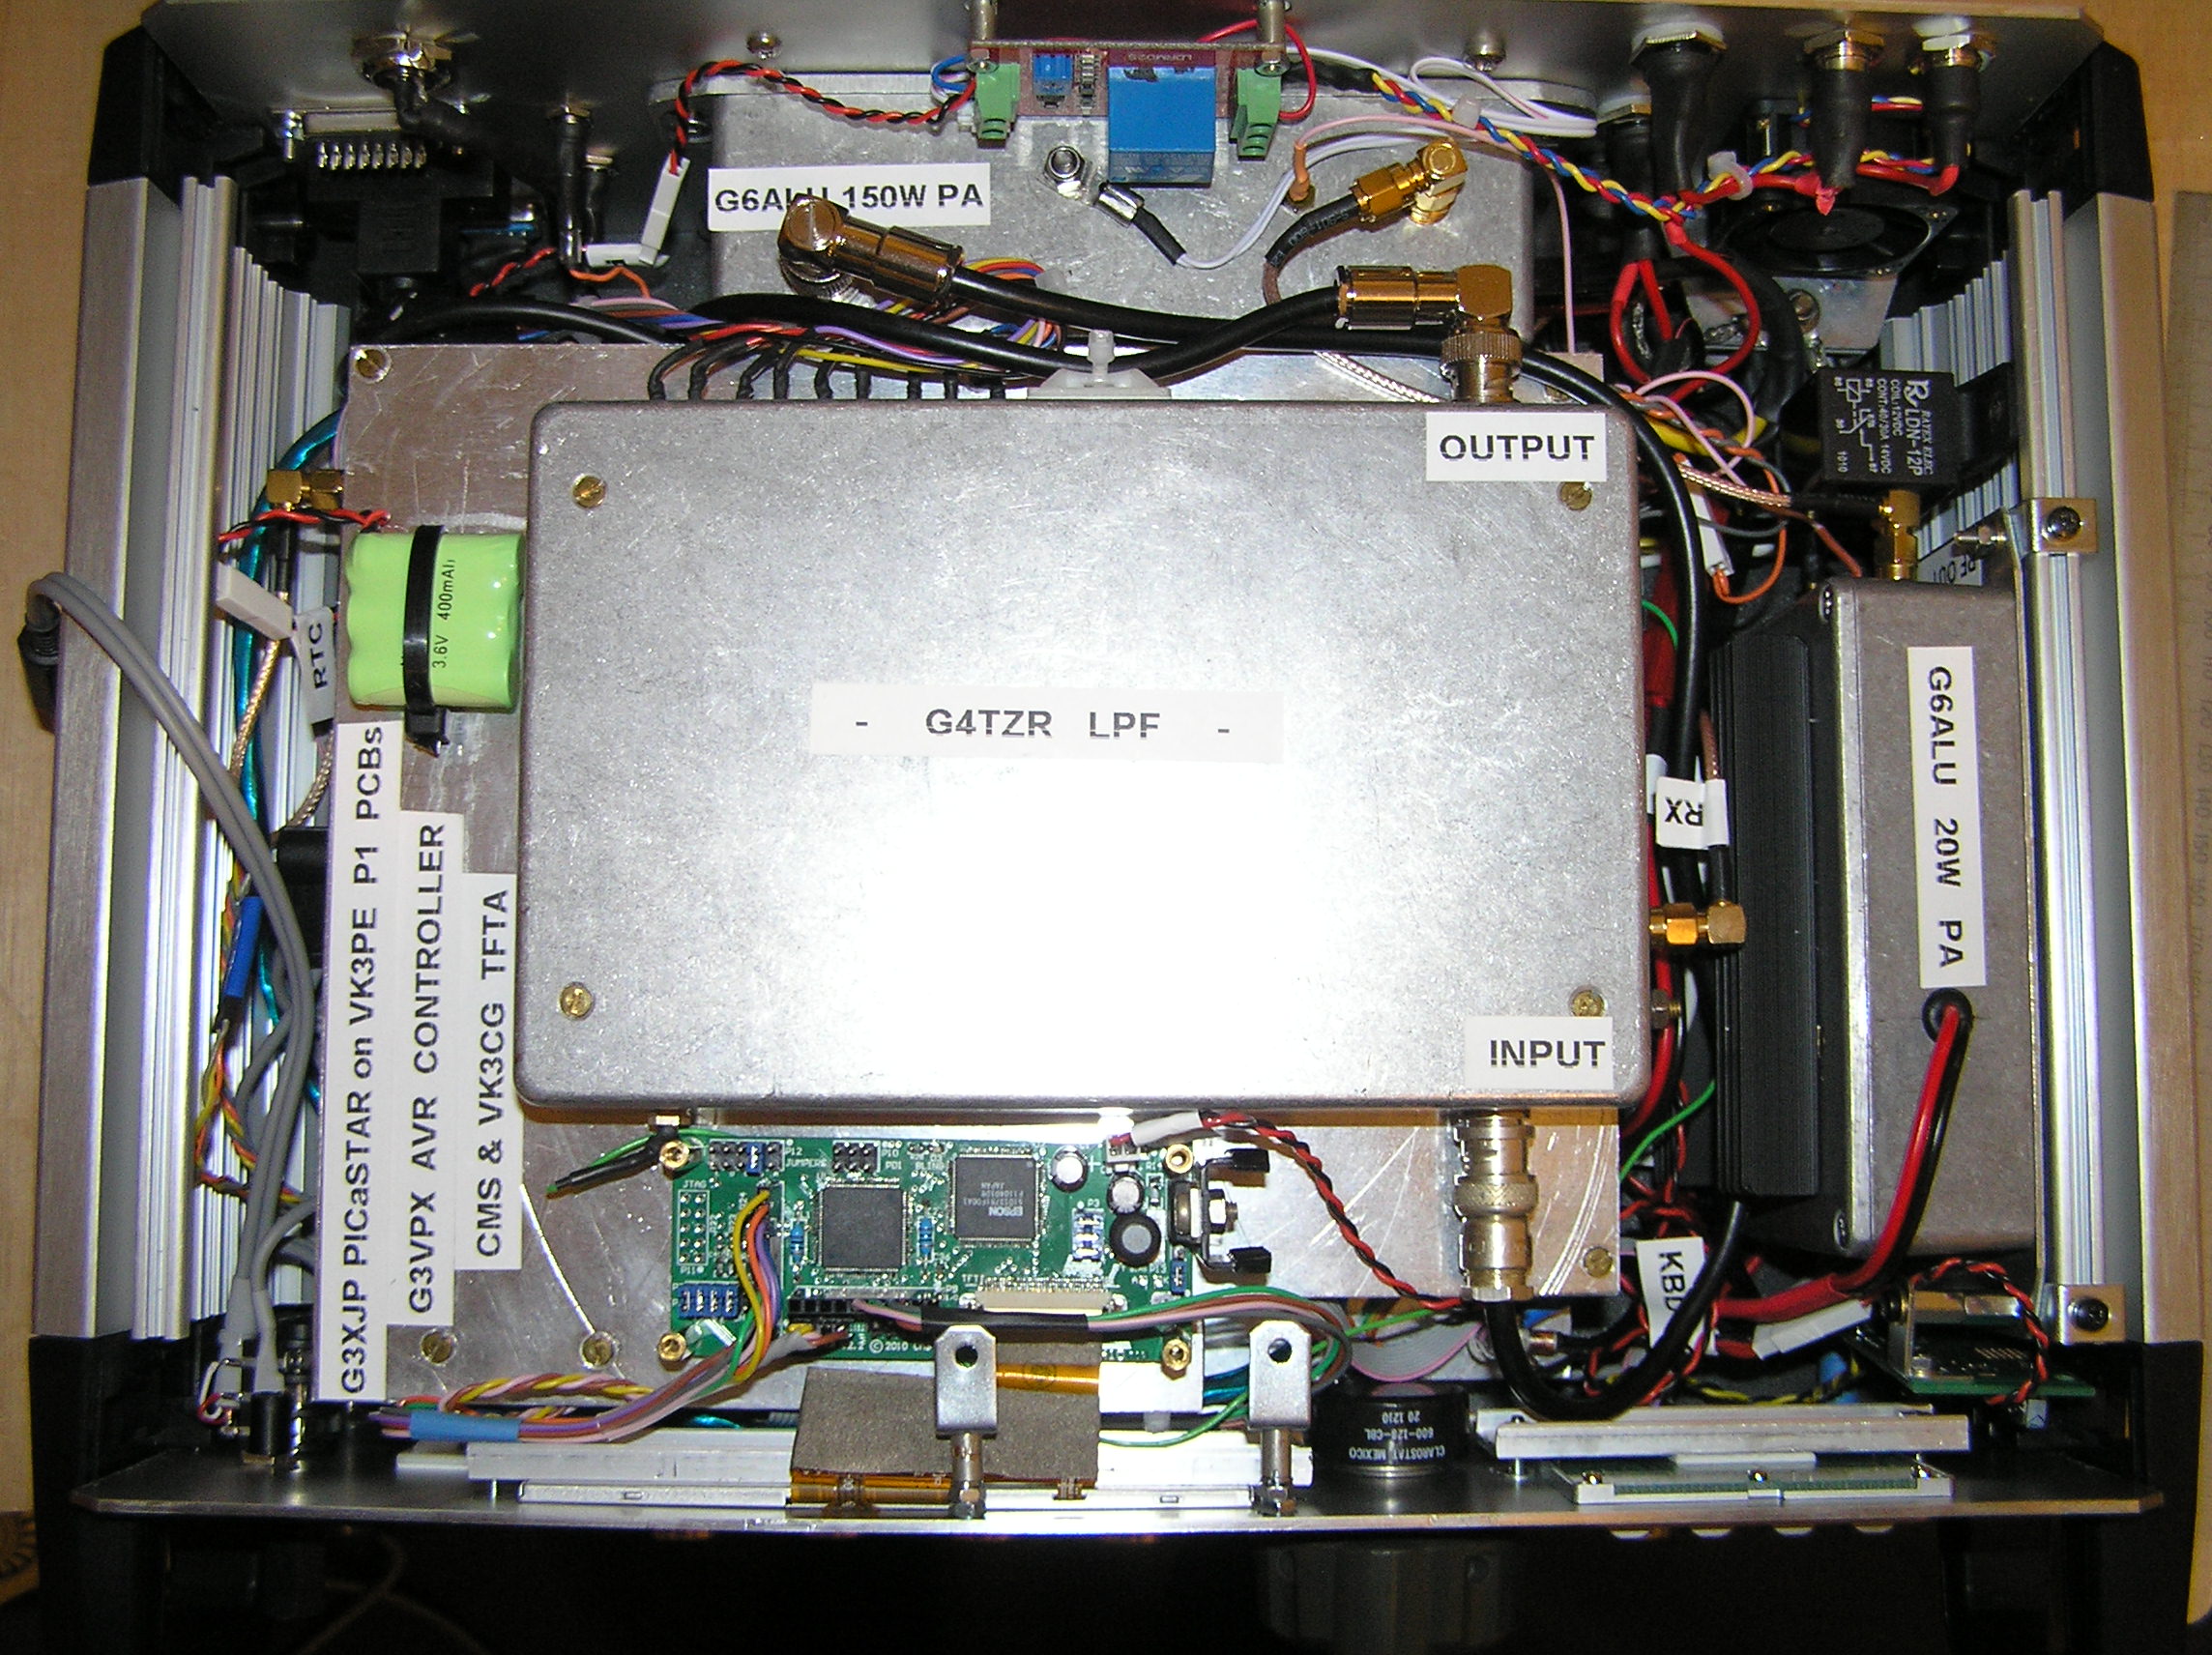
Tony has been very active in home brewing and his latest is a PIC-A-STAR (originally designed by G3XJP) based on the "P" version of VK3PE's "Combo-STAR" PCB's.
As you can see, Tony has mocked up his build so far and in fact has had many QSO's on CW and SSB, as you see it here. This picture gives a good idea of the "P1" and "P2" construction. Two PCB's of similar size contain all but the PA's and LPF boards. They are stacked one on the other, to minimise the footprint required for the PIC-A-STAR Transceiver.
You can also see the colour TFT screen to the right which is a touch screen type. The controller for the TFT is just above it. (the TFT PCB is not supplied by vk3pe)
Tony runs a very tidy shack too ! Puts mine to shame.
Click for larger picture.
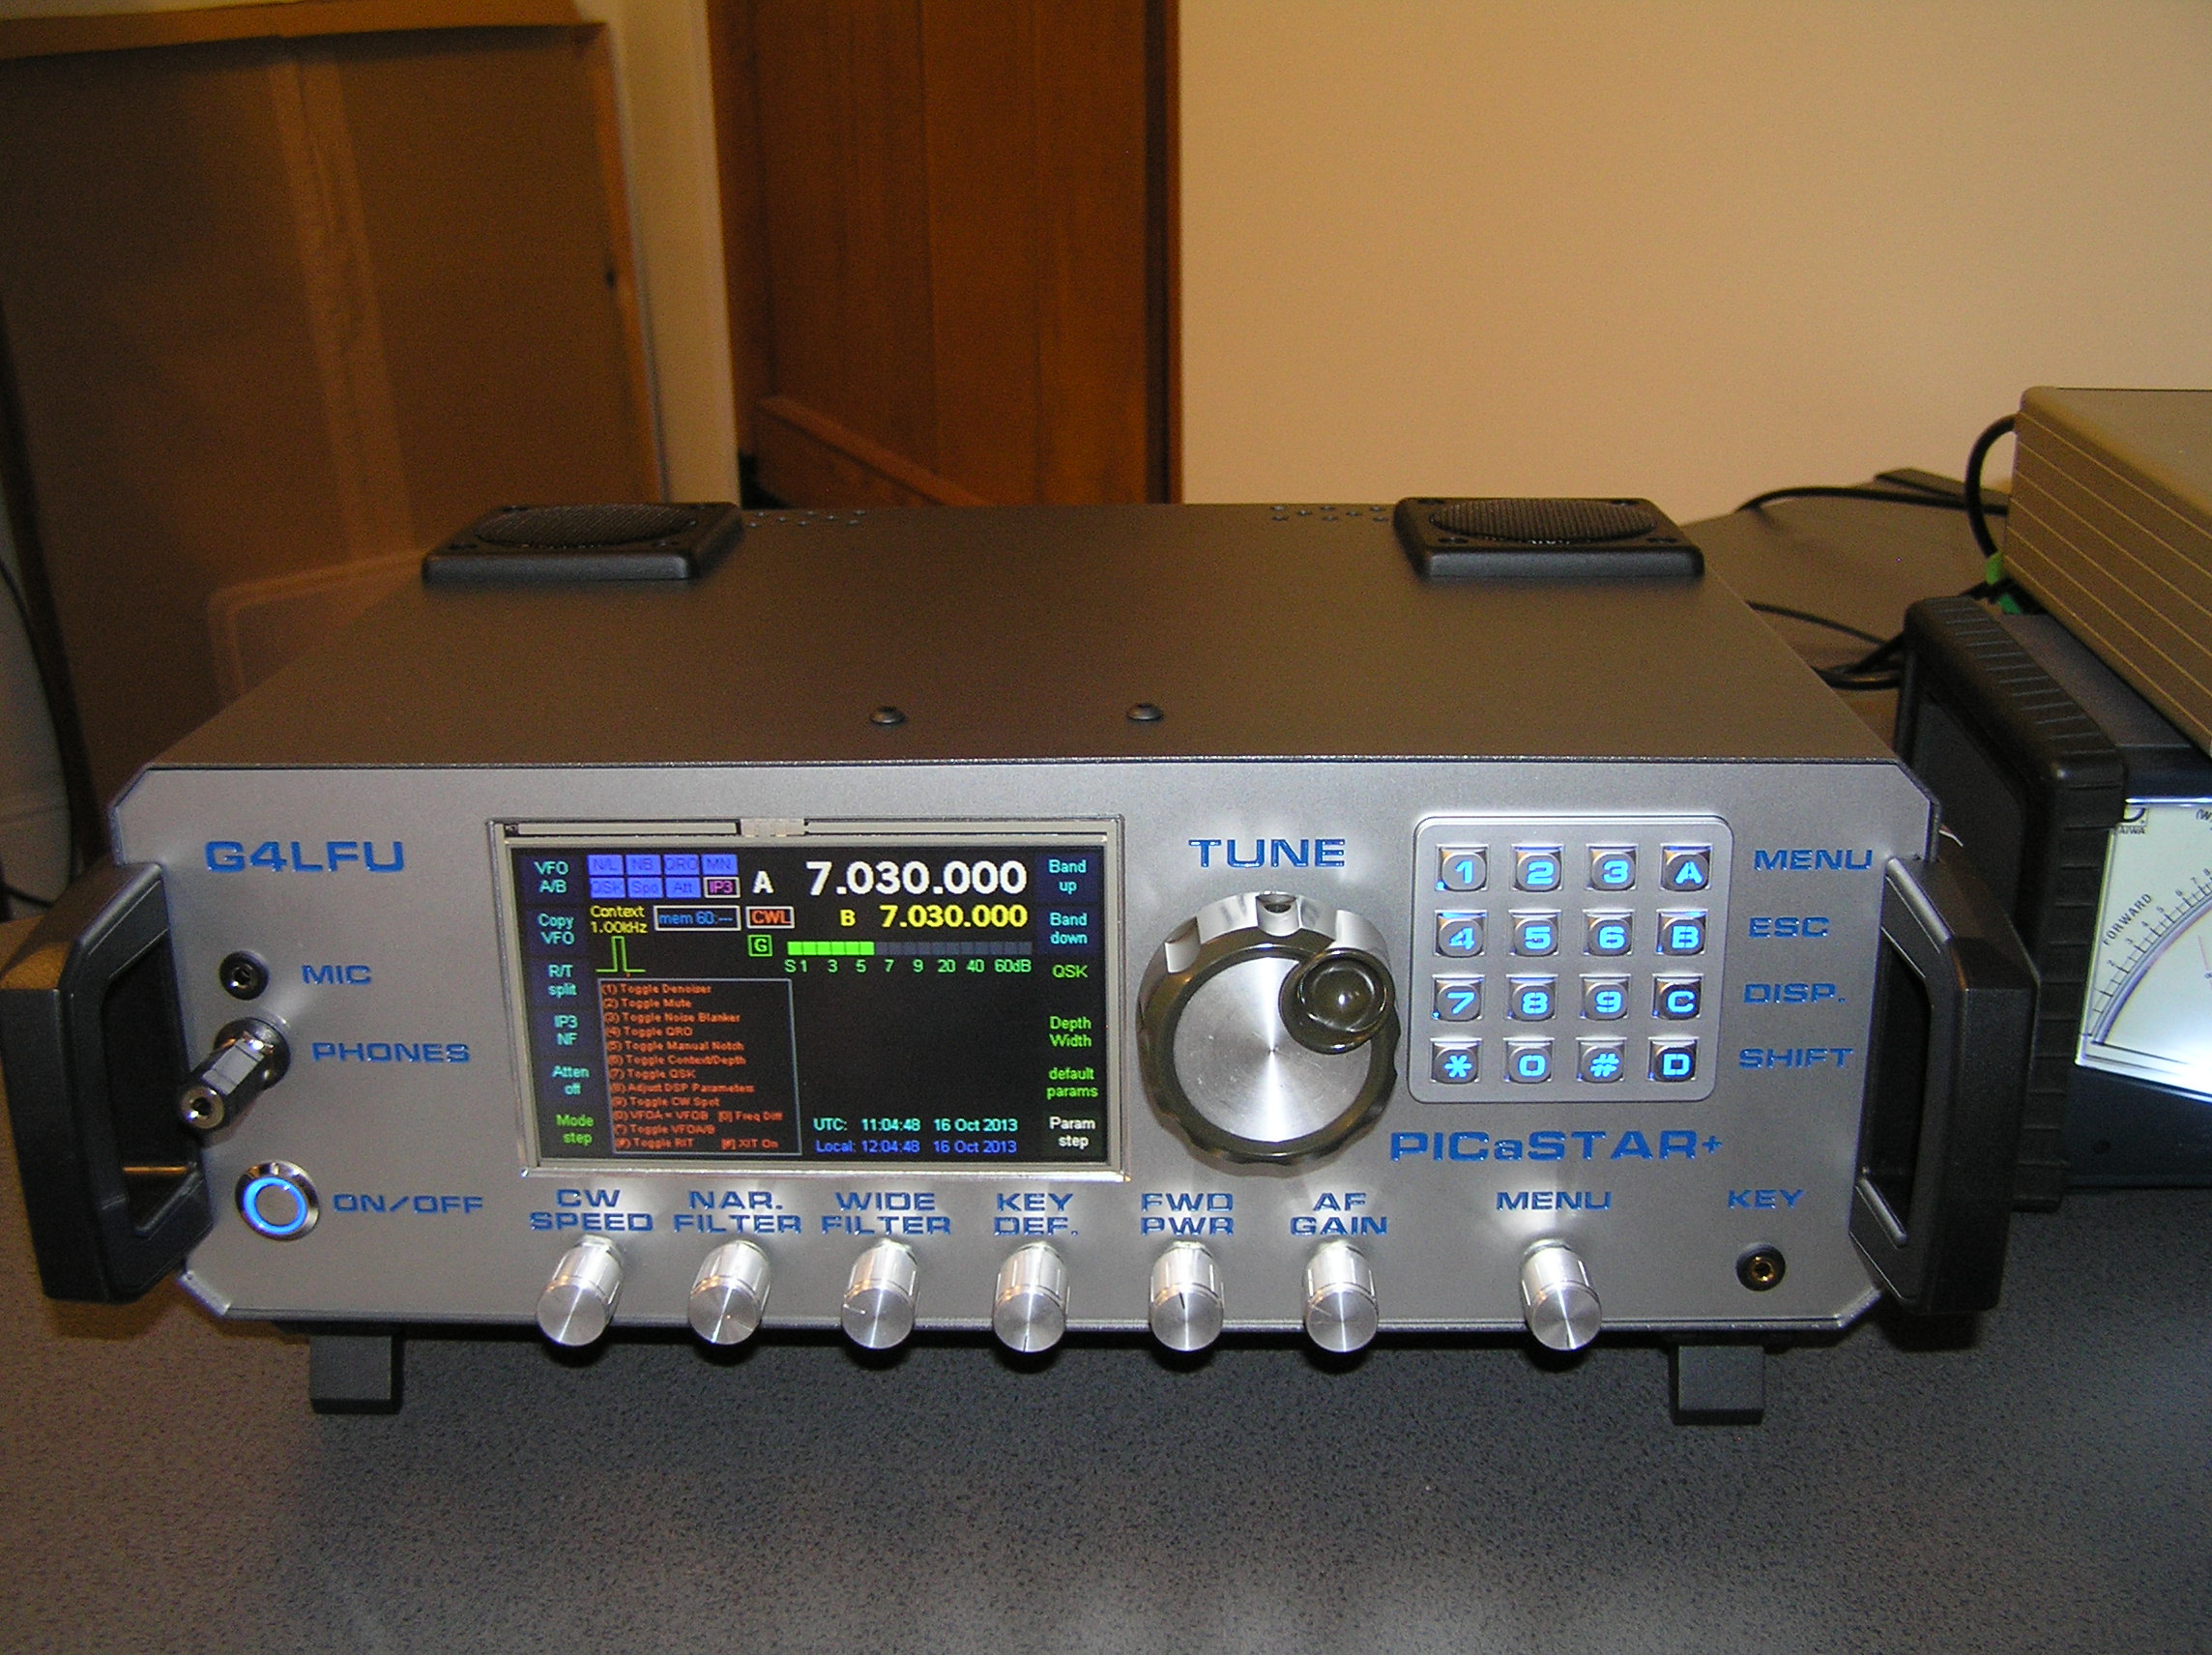
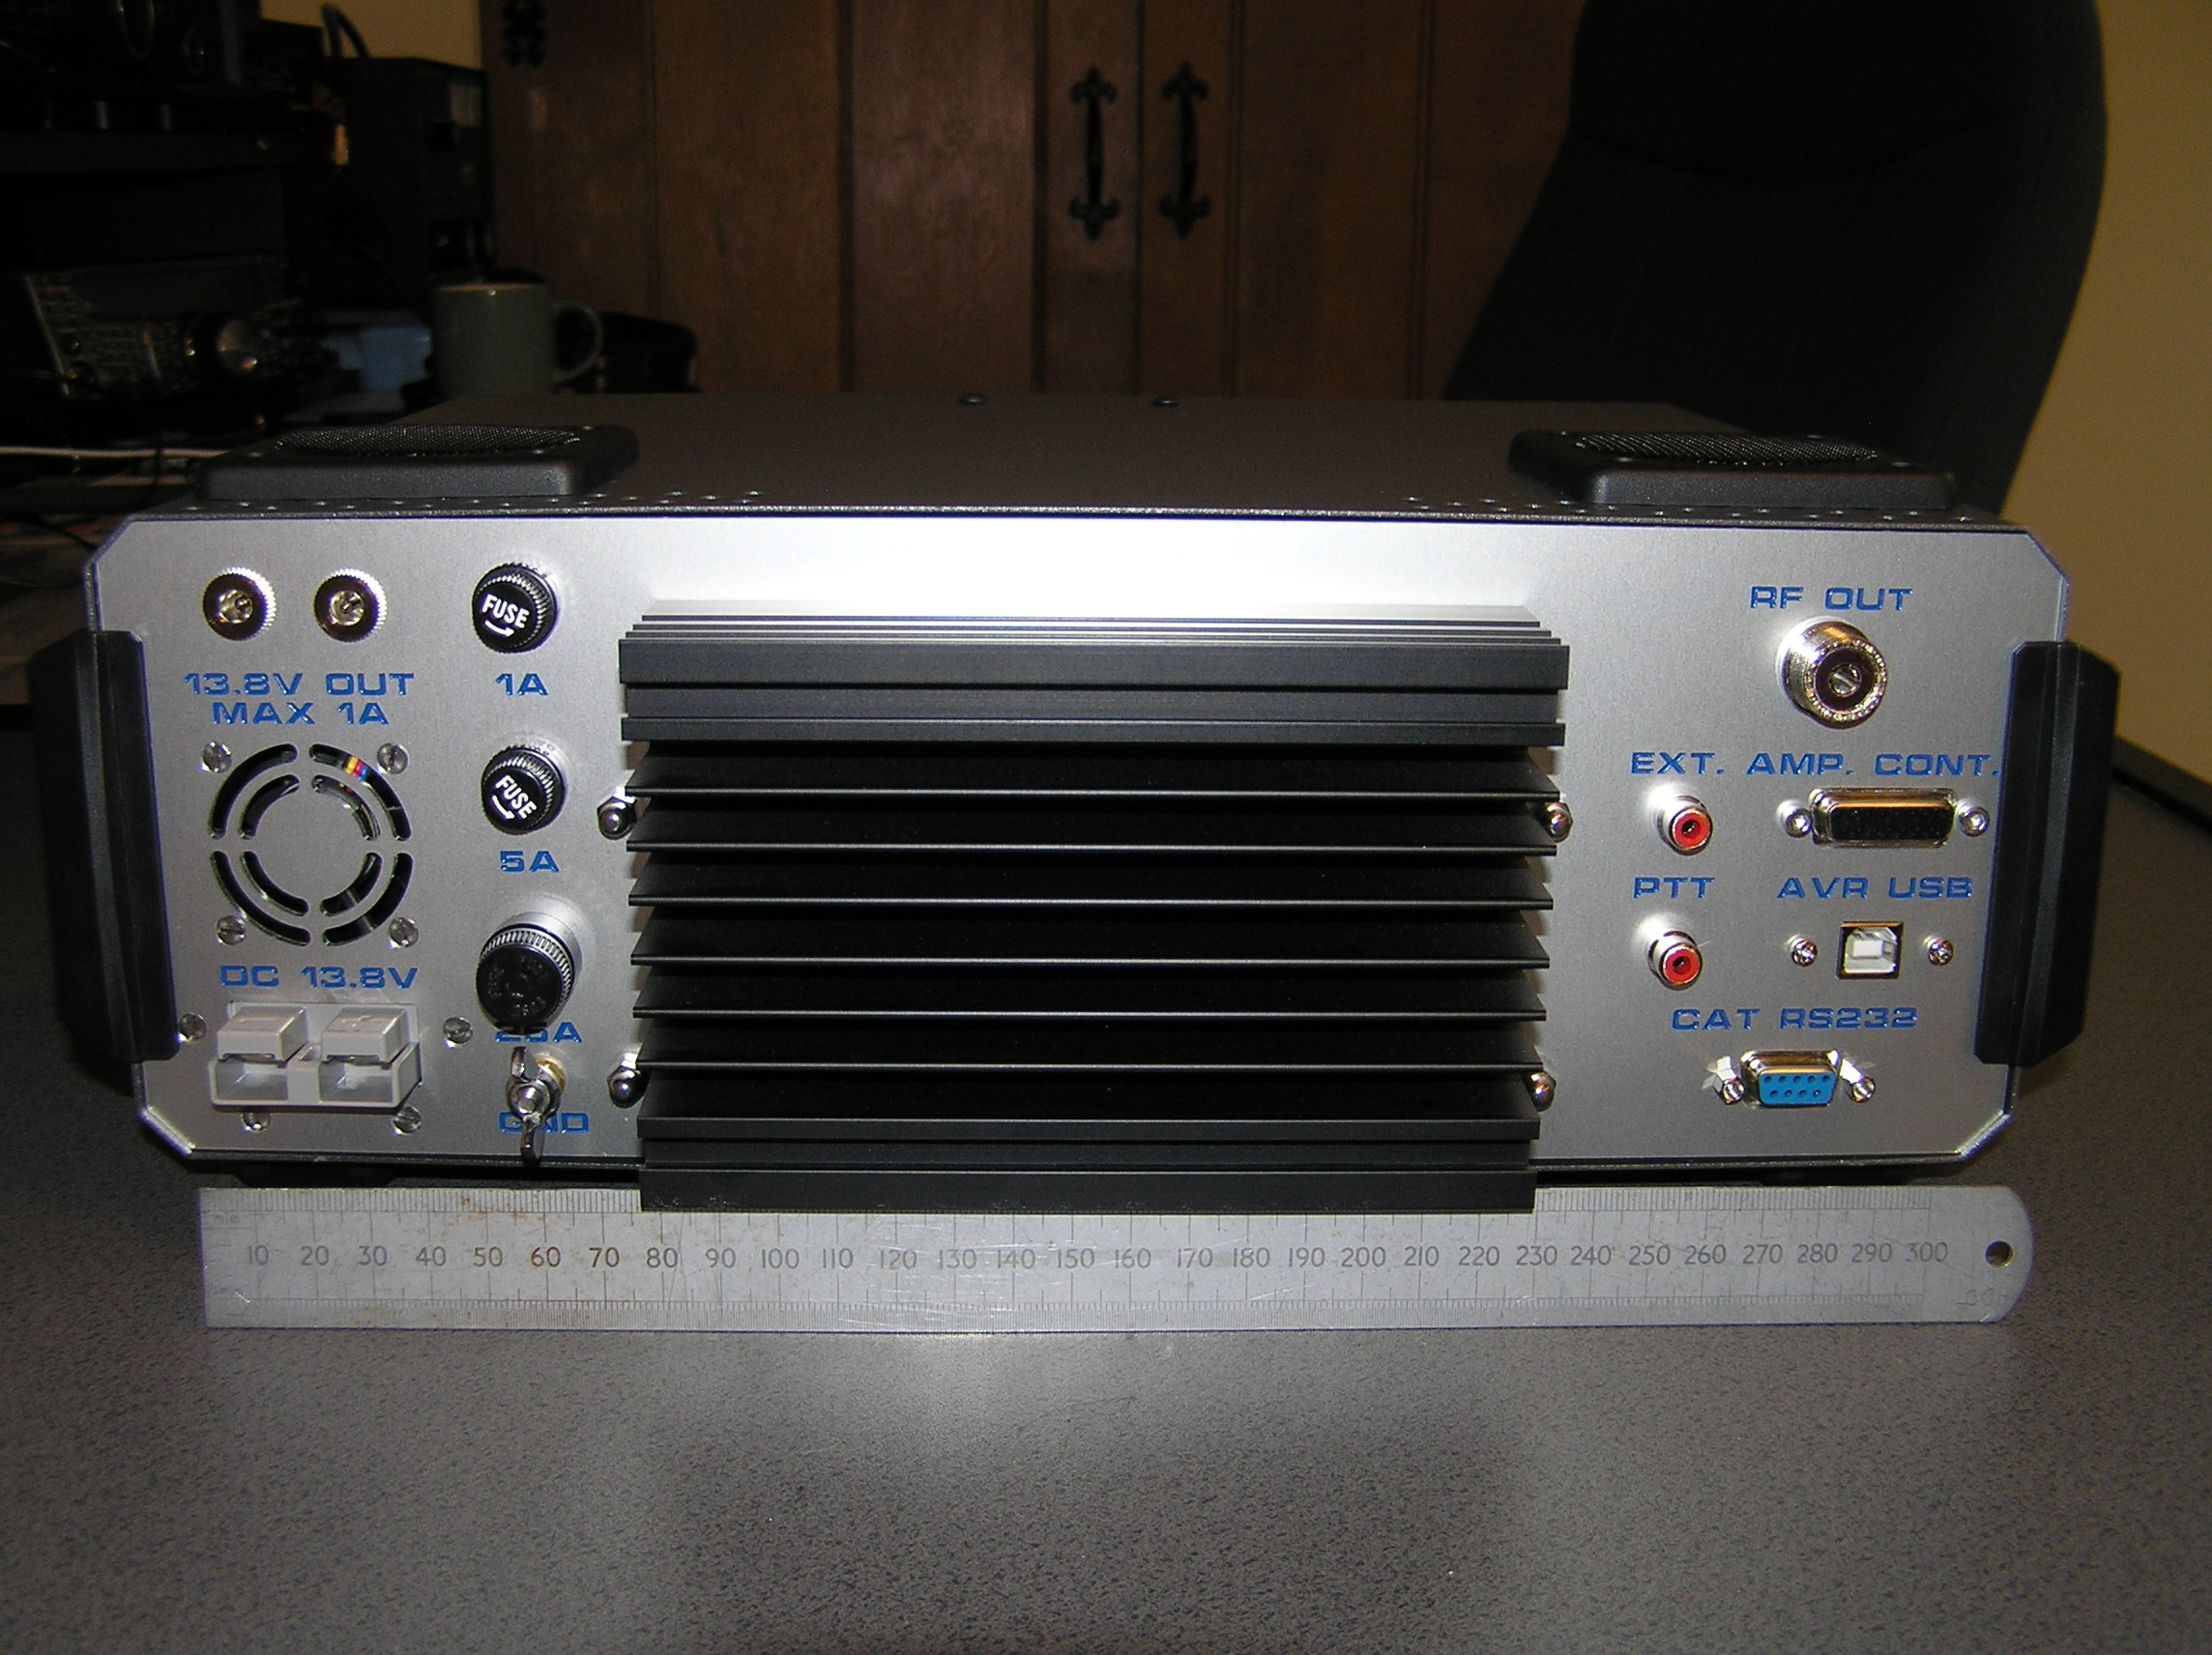
16th October, 2013: Tony has been very busy and produced a fantastic build of his "P1" PICASTAR. Click on the pictures to see a larger one, for more detail. <vk3pe>
Hi Glenn,
Here we have had a decent summer, and it has held me back a bit on my P1 build. But, it’s over now, no more shorts and tee shirts for this year, although I have made more P1 progress this week, as the wx has been lousy.
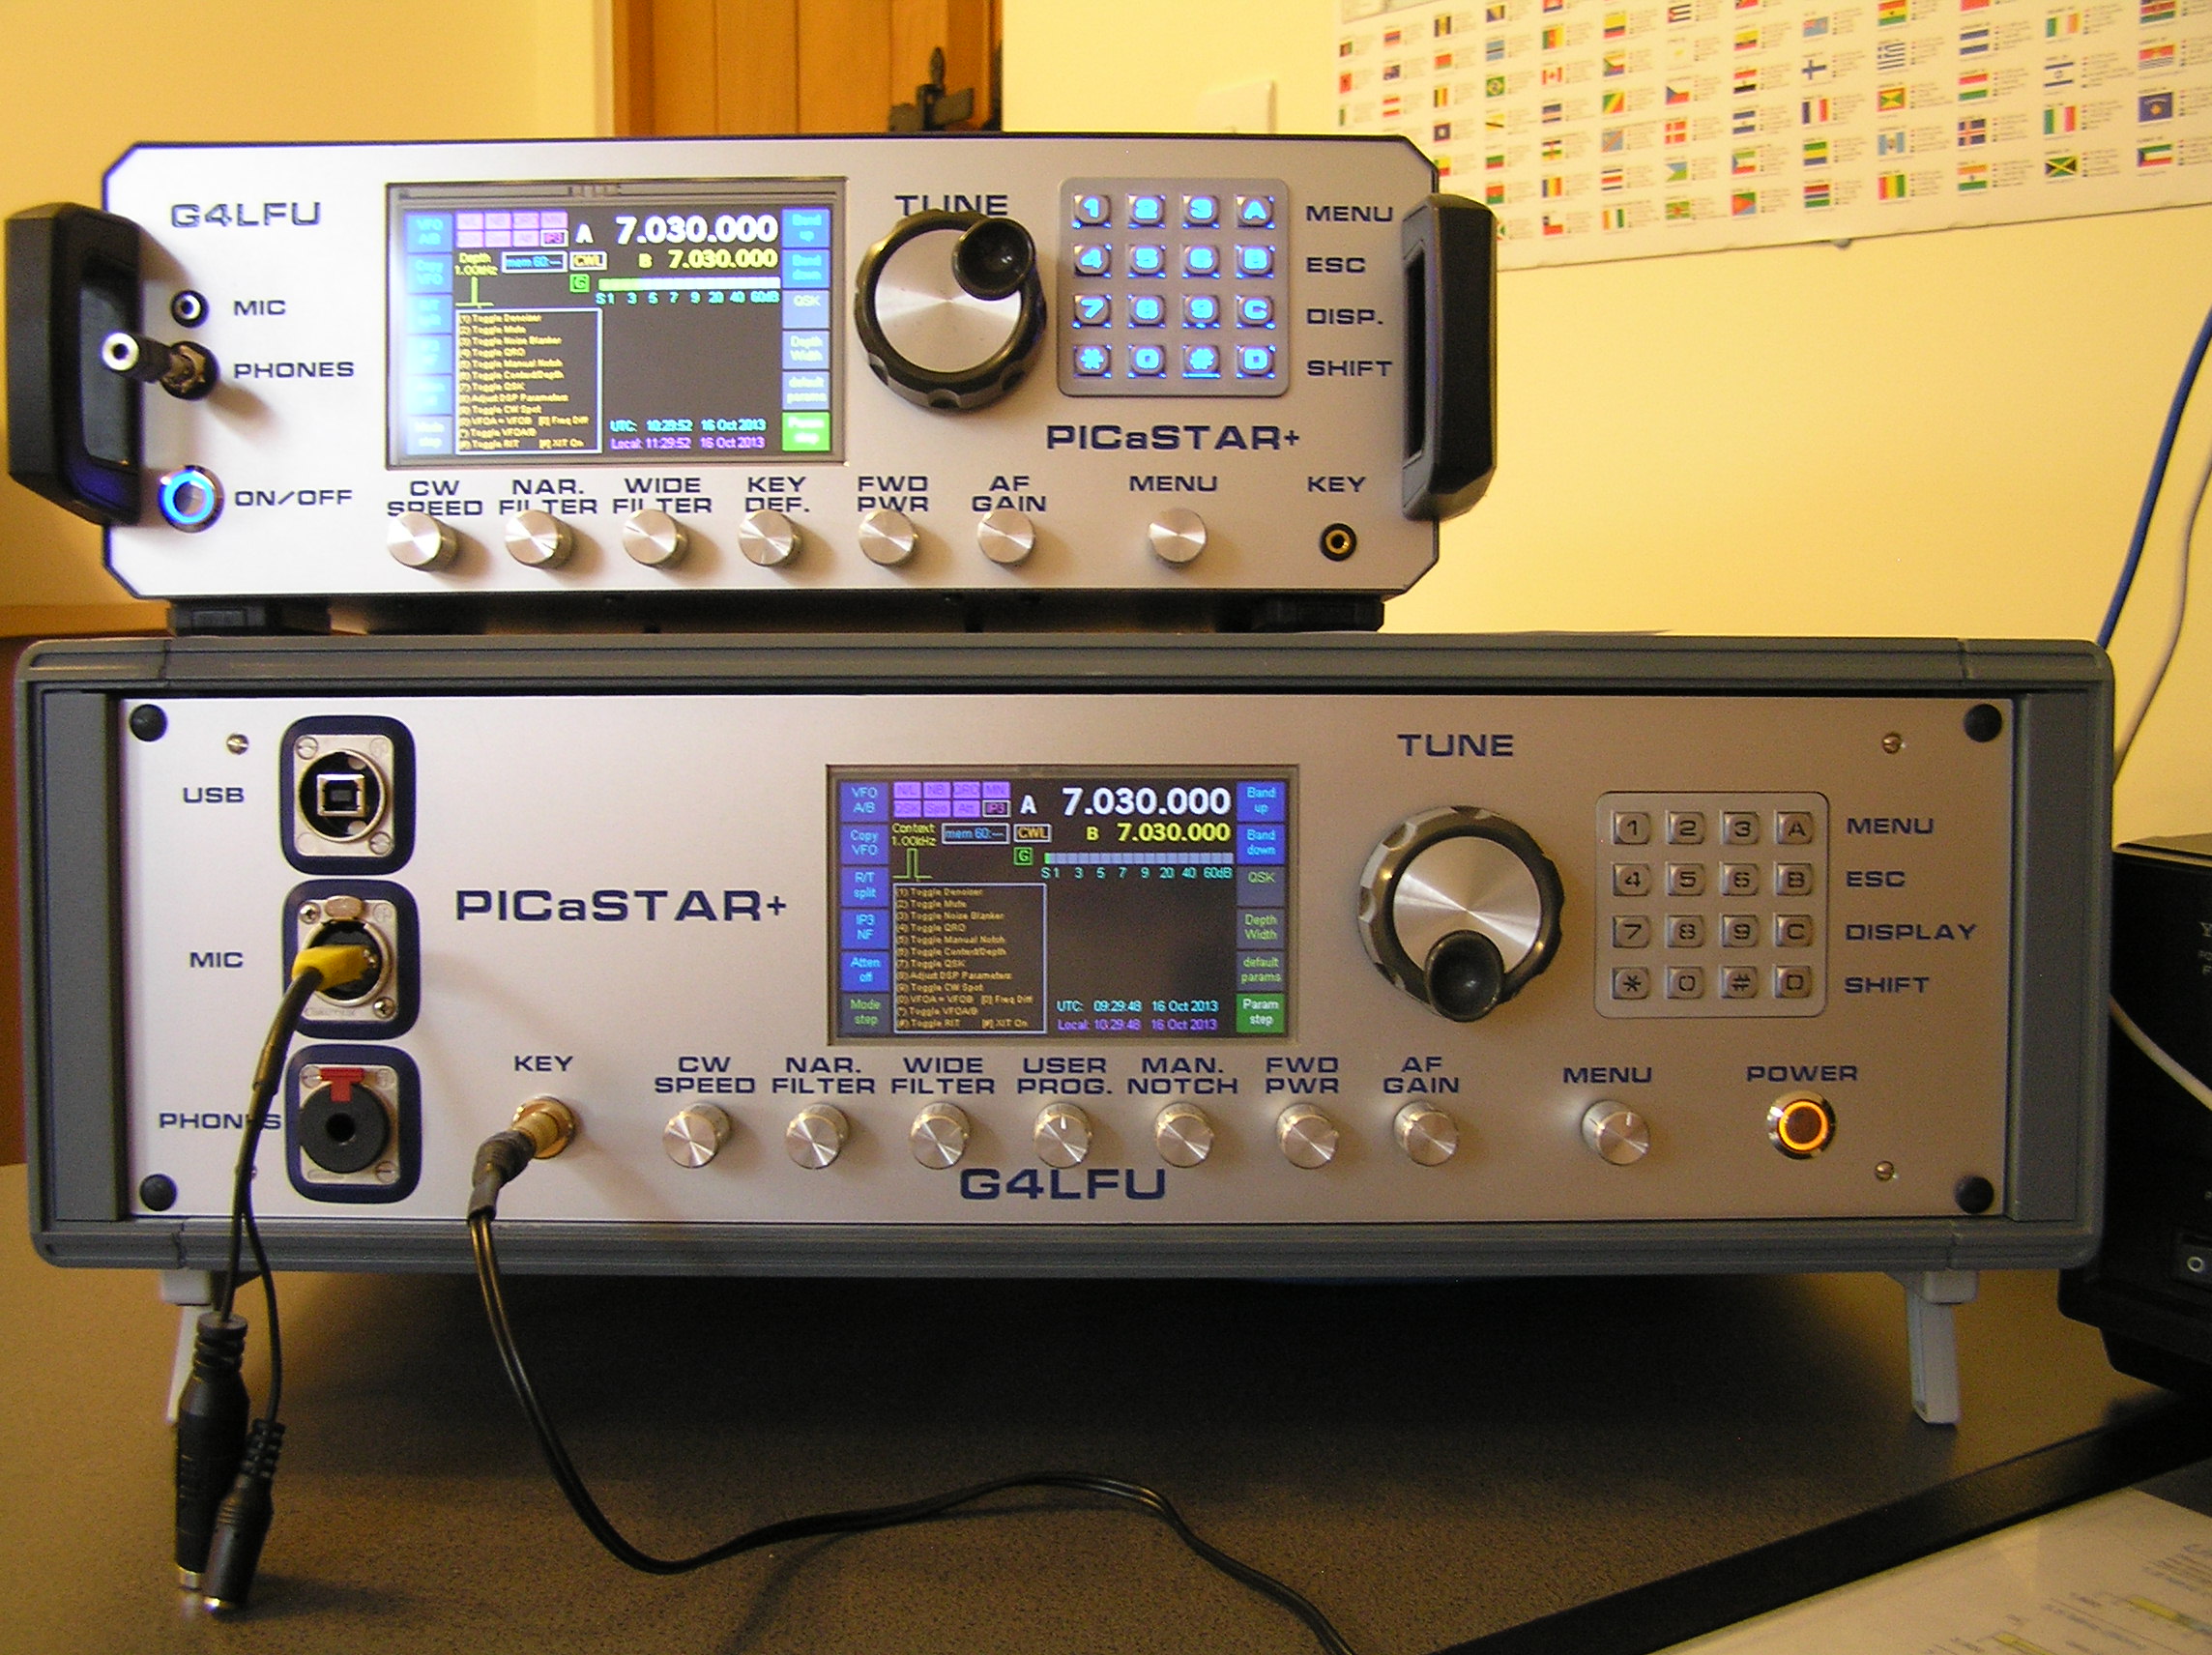
As promised, attached are some pics of my P1 boards built into a box in case they are of interest for your website. I’ve mentioned before that I don’t have your tin-bashing skills, so my P1 Star has gone into a commercial box. It’s 13.5 inches wide by 10 inches deep, and it’s been quite a squeeze getting it all in including the 150W PA.
Although I’ve been QSOing with my P1 Star as ‘bare boards on the bench’, yesterday I had my first QSO’s with it ‘in the box’, and one of my contacts was John/G3GIH who I chanced upon on 80m to find that he was using his Classic Picastar!
I’ve also included a picture of the P1 on top of my C2aa rig – the latter is now known as ‘The Beast’ because of its relatively large size!
Hope you like the pics.
Thanks and 73 de Tony G4LFU
page created by vk3pe on 24th August, 2013