 Click picture for FULL size view.
FRONT PANEL IDEAS FOR PICASTAR
This page is just a few ideas for the making of a panel for your PICASTAR or indeed, any project.
Hi Guys,
After trying several methods/colours and material, the attached shots are before and after shots of my front panel graphics complete for now. I had trouble obtaining a thicker Laser printable clear film that could take the heat from our brand new all bells and whistle Sharp machine.
I did take some advise from Glenn, but could not find thicker film closer to home from suppliers. So I needed to figure out a simpler method using the material at hand. I ended up using a common Laser printable transparency with a reverse print using my Sons Apple Mac software. ( Microsoft graphics is rubbish after using Mac ). the Colour was the most difficult to select due to the base plate being anodised gold.
Colour palette is super black with gold printing to match background. The end result is a fine film glued to the 1mm aluminium face plate using Micador spray ( Aussie Made ) adhesive from a $6.50 aerosol can purchased from Westart, or any major art supplier's store. A light spray on both surfaces and let it to dry for 2 minutes, provided a permanent bond. Please note, any dirt participles on both surfaces will show up as lumps side on, so use a dust free room where possible. The Micador left a slight misty coating on the 7 segment window on the inside, this actually added to the effect and did not disappoint the visual affect, defused it slightly which suited me fine.
Overall, I am very pleased with the outcome, although as a printed film it looked not much at first, but once glued / assembled, the LEDs and 7 segment display came though much better then first envisaged. At first, I thought the LED's would be to dull, ~150-300 mcd for the 3mm. However the face plate holes from drilling ended up creating a shinny tunnel like effect, making the LED angle emission very affective and the black colour gave it that bezel look, added with the slight defused look from the adhesive spray allowed the light to scatter. The streak you see on the photo is a reflection due to the high gloss finish from the vertical blinds and sun light.
In a nut shell, if anyone needs art work done with a combination of colours please let me know, I can only offer it on transparency film, but as many copies as needed for experimenting.
Happy building everyone. Note the "Southern Cross" star cluster.
Regards Gerald VK3FGJM
Click picture for FULL size view.
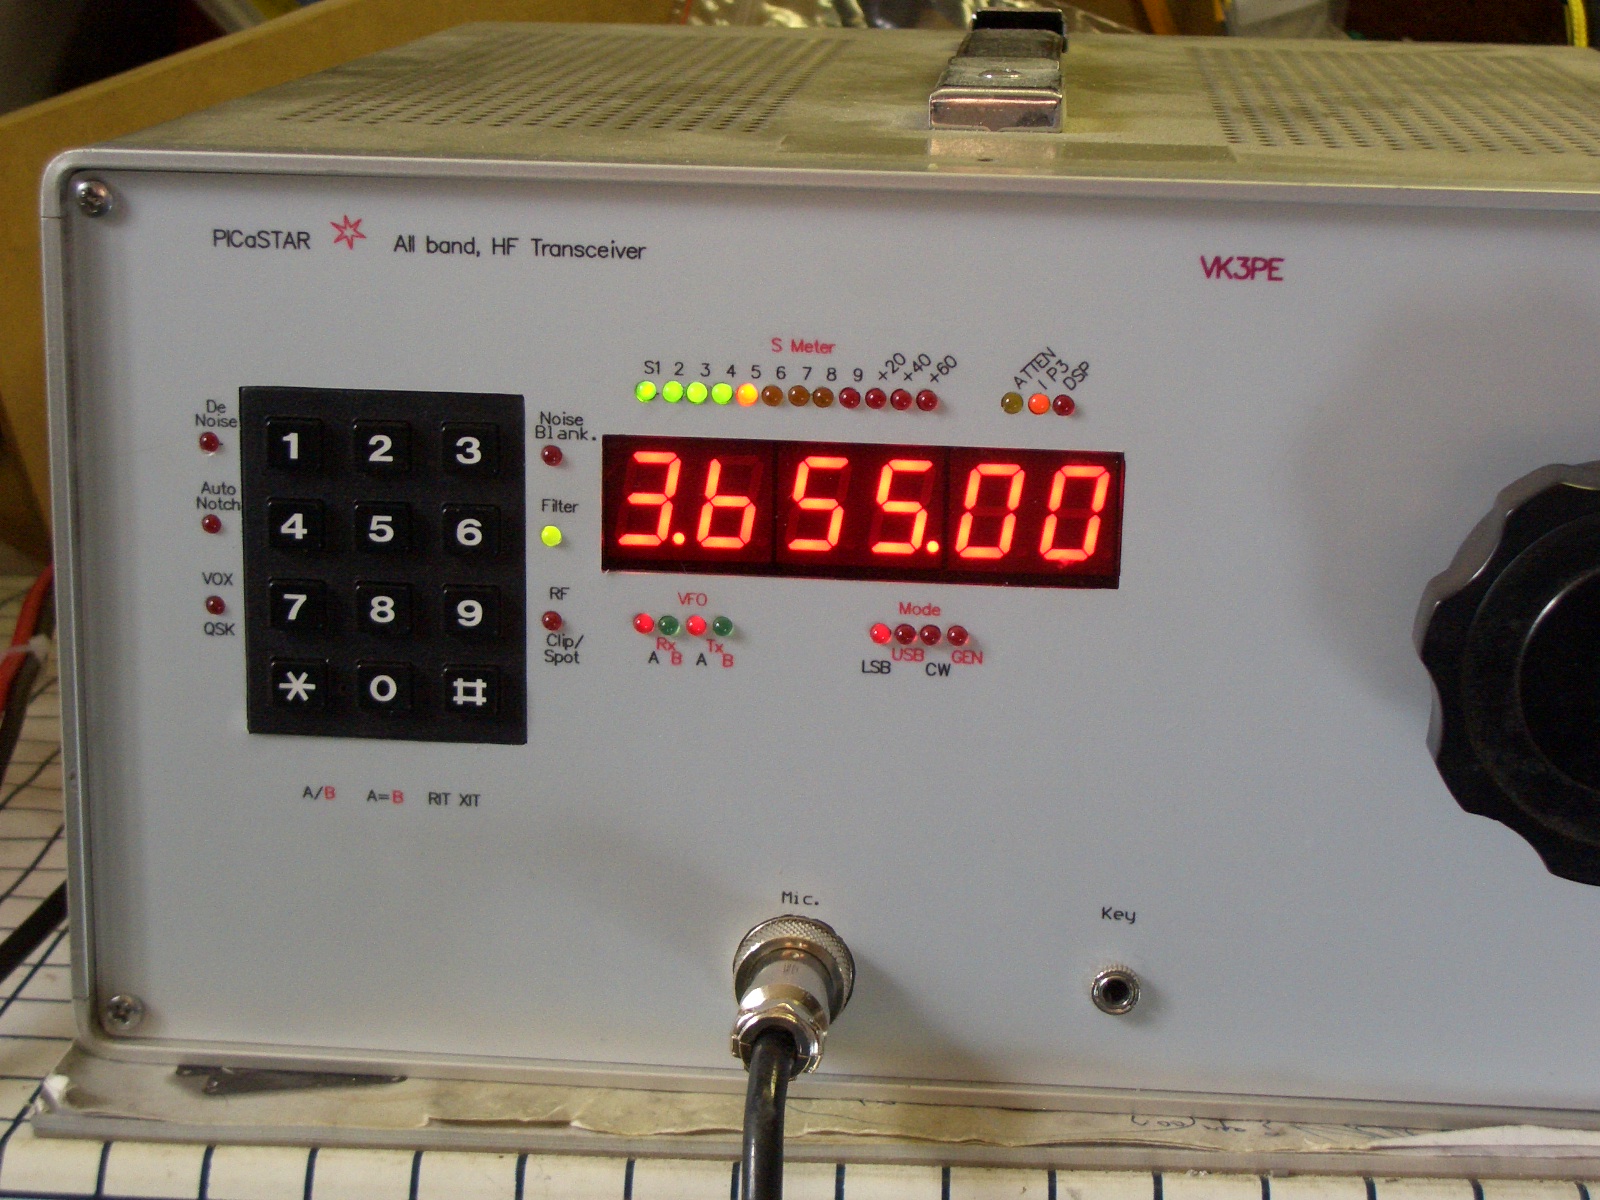
This is my version, similar to the above but different materials.
I used a light grey Polyester material which is adhesive backed. It comes in A4 size sheets and is available from Kalex in Melbourne who also supply PCB materials. Cost is about $3 per sheet. It's also available in white.
Printing was done with a colour Laser printer.
Glenn, VK3PE
 Click for closeup view.
See also the builders pages for other builders solutions.
Page created on 12th Nov, 2008 by VK3PE