
|
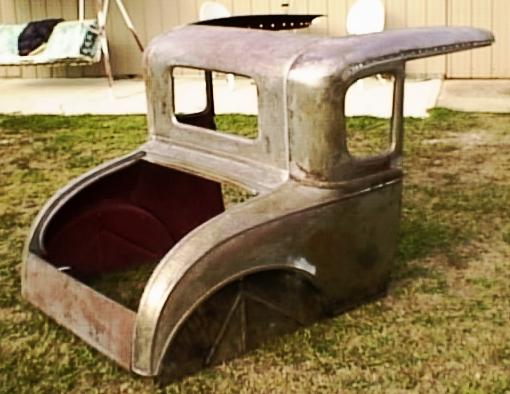
As usual with a 70 year old steel body, time and man have taken their toll. Rust, bullet holes, neglect and previous damage are all evident on this body. The left rear quarter panel is the worst and needs extensive repairs due to all combinations of damage. I started to repair the original but came to the conclusion that some sections of panel will have to be replaced. The rest of the body is in a similar state and I am trying to repair everything using the file finish technique. That is, panel beat the damage until running a body file over it reveals no lows or highs, just steel as Henry made it. (or maybe better) It takes a long time.
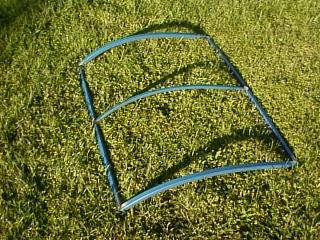
Trunk Lid construction on 1930 Ford Hotrod. As the body did not have a trunk lid, I decided to make my own. Here is how I am doing it. I made a tube (3/4") frame and curved it in gradually in a vice, (or hold tube between two wooden blocks and use a heavy hammer to gradually curve the tube) to the shape of the trunk opening and I have curved a piece of 0.8mm steel sheet on an English wheeling machine (at TAFE college) It will be completed when the body is back together, to allow accurate fitting. The curved sheet will have its edges turned down at 90 degrees and it will be attached to the frame via some other sheet steel pieces (not shown) and then spot welded around the edges. Hinges will be home made also. More details to come.
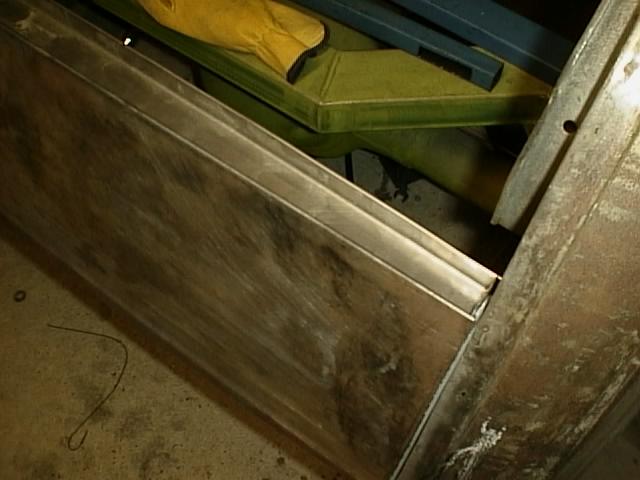
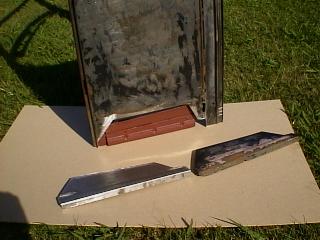
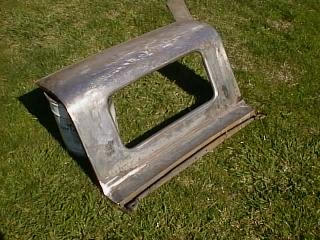
Cowl Repairs The bottom edges of the cowl have rusted through and have now been replaced with patch panels. This pic. shows the rusted section cut out (plasma cutter at TAFE) and the new patch panel, cut to fit, to the left. It has been oxy-acet. welded into place using hammer weld technique where access to the rear is possible. The cowl has been de-rusted in the molasses bath (see de-rust button) and the internal sections primed.
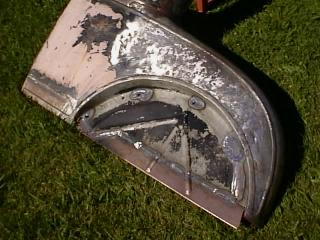
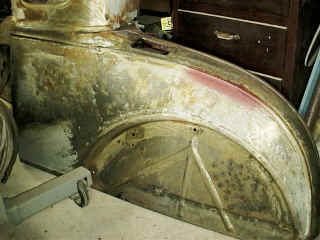
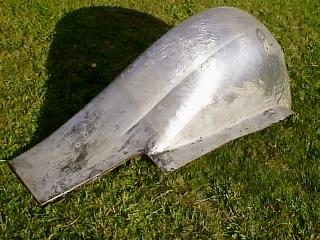
Fender repairs are another major item to
tackle.
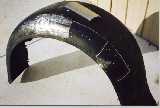
This panel was badly creased on the top right hand side and also featured several bullet holes and dents around the window opening and bottom edge. Although not adverse to some history in my Rod, I decided the holes had to go and hence were repaired along with the crease.
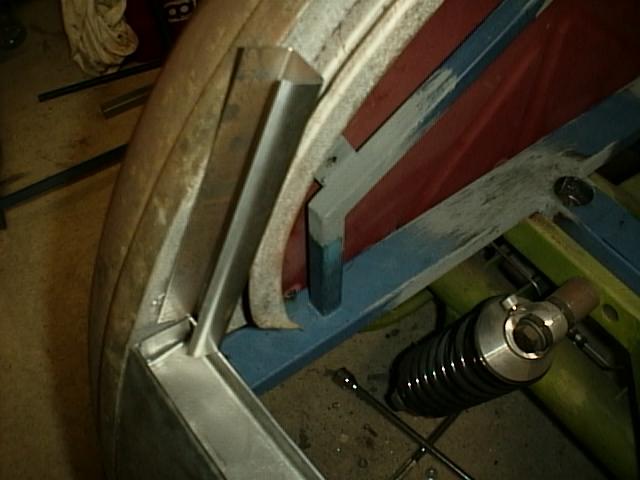
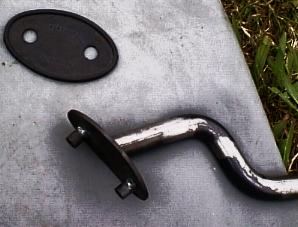
Not really a body repair, but I thought I would try making my own headlight bar with hidden bolts. I bought some 3/4" rod and tube ($8) and then turned the end down on the rod (bottom left of pic.) so that it would fit inside the tube. I made a simple jig and bent the two rods to shape, using the oxy torch. The tube forms the centre section of the bar and the joints will be welded. The oval shaped end pads are also home made using an angle grinder.
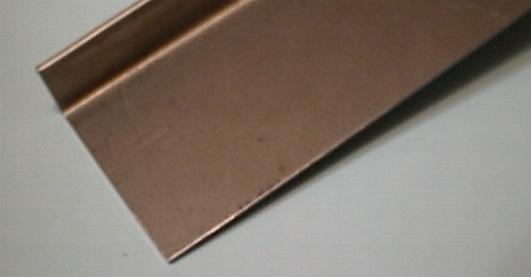
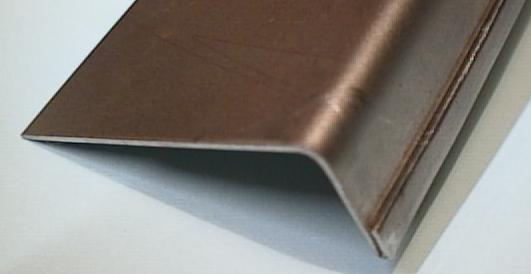
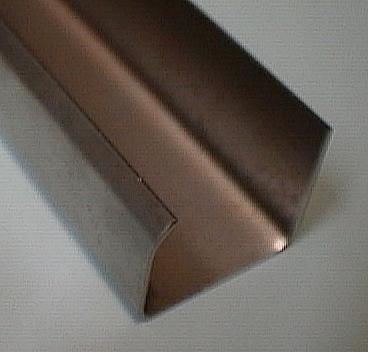
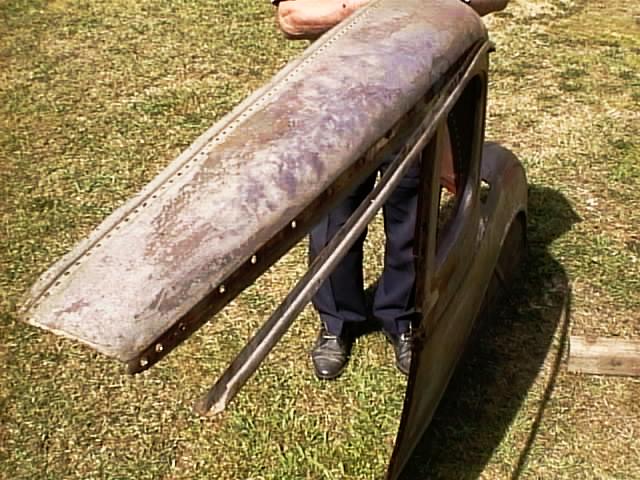
New Rain Gutters The old rain gutters on the coupe are badly dented and on the left side, are also rusted through. I had been worried about what to do with them for a while, but decided to make new gutters up, at night school. Removing the old gutters was done by drilling out the spot welds from inside the body using a spot weld drill. This exposed a lot of rust also which will have to be removed. I folded up new gutters in two pieces, joined in the middle (because I used a short folding machine) virtually to the same size as the old ones, but as a simple "J" shape only. They were then bent to shape (over my knee) until they were a good fit. They will be welded back using MIG on the inside of the body and will also be sealed with a suitable sandable sealant. Pictures show old gutter being removed, new gutter trial fitted, held by a clamp only.
23rd April, I trimmed the new gutters to length and welded them from the inside, onto the body. Before I did that, I thoroughly cleaned the area on the roof and gave it a coat of zinc loaded paint, hopefully to stop more rusting. I will fill the gap on the top and bottom of the gutters, to the body, with a suitable paintable seam sealant. The left picture show the new gutter and the body masked with the zinc paint applied in the gutter area.
New Gauge panel
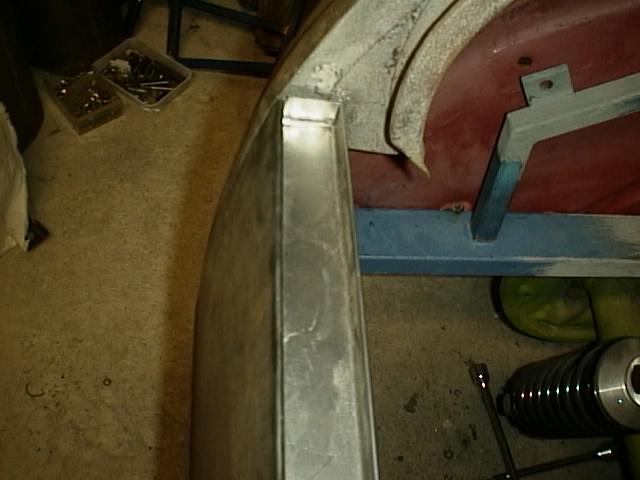
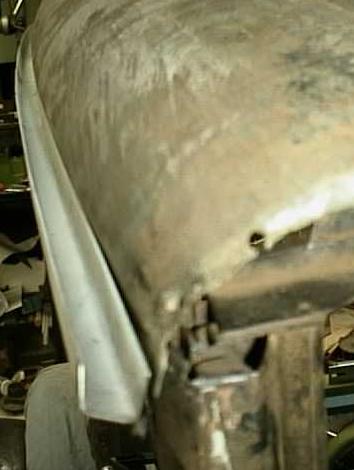
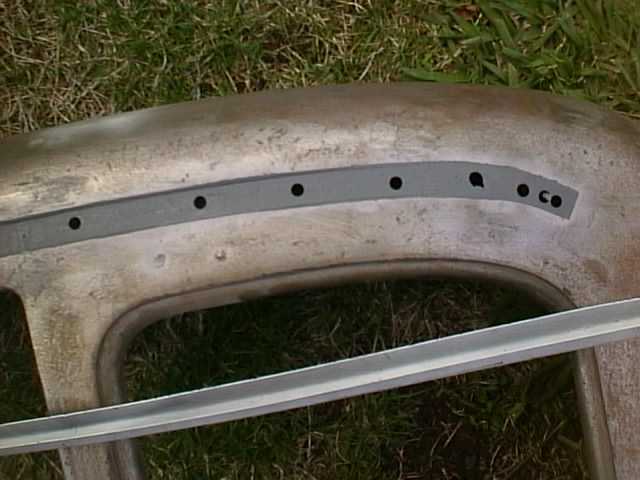
TRUNK GUTTER At the rear bottom edge of the trunk, I need to add a gutter, to stop water from entering the car. I decided to make a "U" shaped gutter running across the rear panel, below the trunk lid. It will be connected to the side gutters on the trunk also and water will exit via drain holes and tubing at each end. I used a piece of 18g steel and folded up a lip of about 15mm on one side of the gutter (to front of car) and also folded a 5mm section over on itself so there are no sharp edges. For the other side, I made up a wooden pattern to hammer form a curved edge, to match the rear panel.
January 21, 2002 updated August 13, 2010
|


 the old panel.
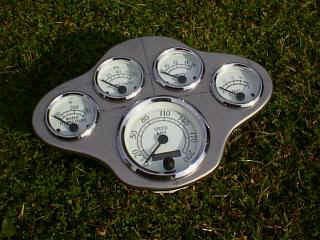 Hammer formed at home over wooden form.