Last updated on November 6, 2009 ( new build and integration pictures added)
Hi Glenn
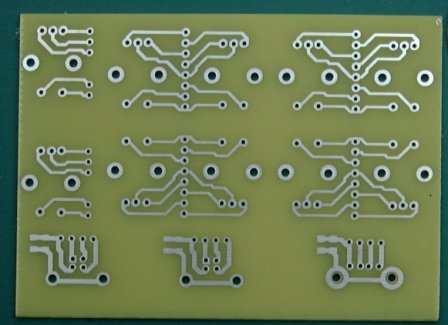
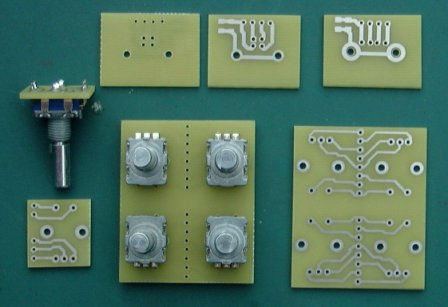
I have attached a simple single sided pcb design using the Pad2Pad free software which includes 7 individual small boards as follows
-Two boards on which 4 encoders each can be mounted and allow wire loom to be connected
-push button feature is supported. Spindles are on a 0.9" grid Two boards to take "menu" encoder
- one spare Two boards to take remote USB socket type USB B (not so fiddly as mini) One board to take USB socket type USB A (ditto) Not much of a design but might help someone. Thank you for all of your hard work on your web pages
- the're a daily re-read here.
Kind regards,
Paul M1PVC
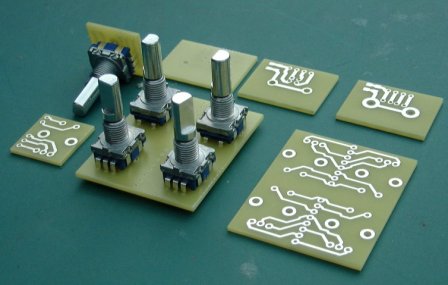
Paul has a very neat solution for mounting the encoders without a lot of messy wiring that may potentially break off the encoders. Pads2Pads is freeware and although I have not tried it, I am assured it's easy to use. In any case Paul has provided the PCB file and you only need to print it out and make the PCB's <Glenn, VK3PE>
5th Sept, 2009: Paul advises that when making the PCB's the printed mask needs to be mirrored, if using the iron on technique. Paul advises that the pictures previously posted here were reversed. They have now been removed. The ones below are correct.
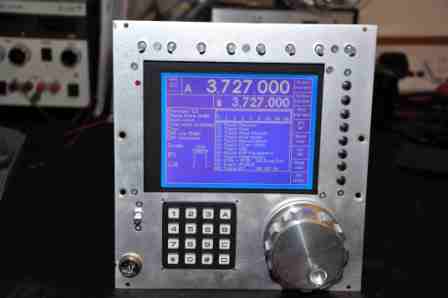
4th Oct, 2009: Paul has now updated his Picastar to fit the Trxavrb and a 320x240 display. This entails a lot of re-work as space is at a premium in most Picastars.
Hi Glenn
I attach a couple of taster pics (one of a series that I've been taking) severly compressed as the original "raw" file is rather large from the new camera.
As before my new front panel comprises a sub-panel and a cover front panel which effectively hides the numerous screws needed to mount everything. I have mounted the 8 switches and 9 Sure encoders on a sub-sub-strip to avoid the spindle nuts showing on the front panel. I've yet to make the encoder and switch knobs which I will turn up from aluminium bar. The tuning encoder will have the same large aluminium knob as before. All rather tight but everything fitted in the end except for the 2 pots (not really needed) and a USB socket which will now have to be on the rear panel together with the RS 232 sockets (pity as I will need to strip down the rear panel to achieve this which is a fair bit of work). If the spacing of the switches looks uneven this is because they are - I have aligned them to come each on the centerline of the 8 display "labels" which are not the same spacing. Hope the team don't alter this or I will be stuffed. I drilled all the holes using my vertical milling machine in jig borer mode - certainly helps in putting holes where they should be but takes more time - nevertheless a satisfying result.
Paul
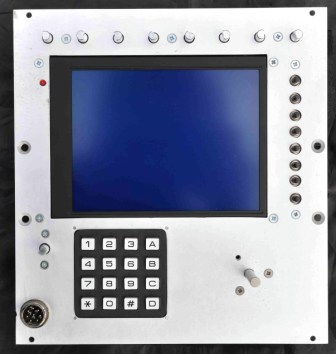
 Knobs and front panel not yet fitted.

BEFORE: Quite a change !
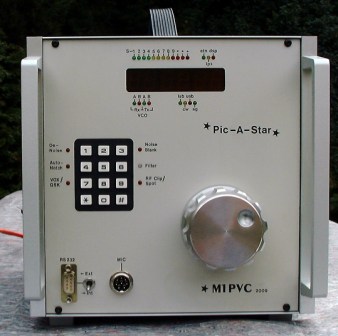
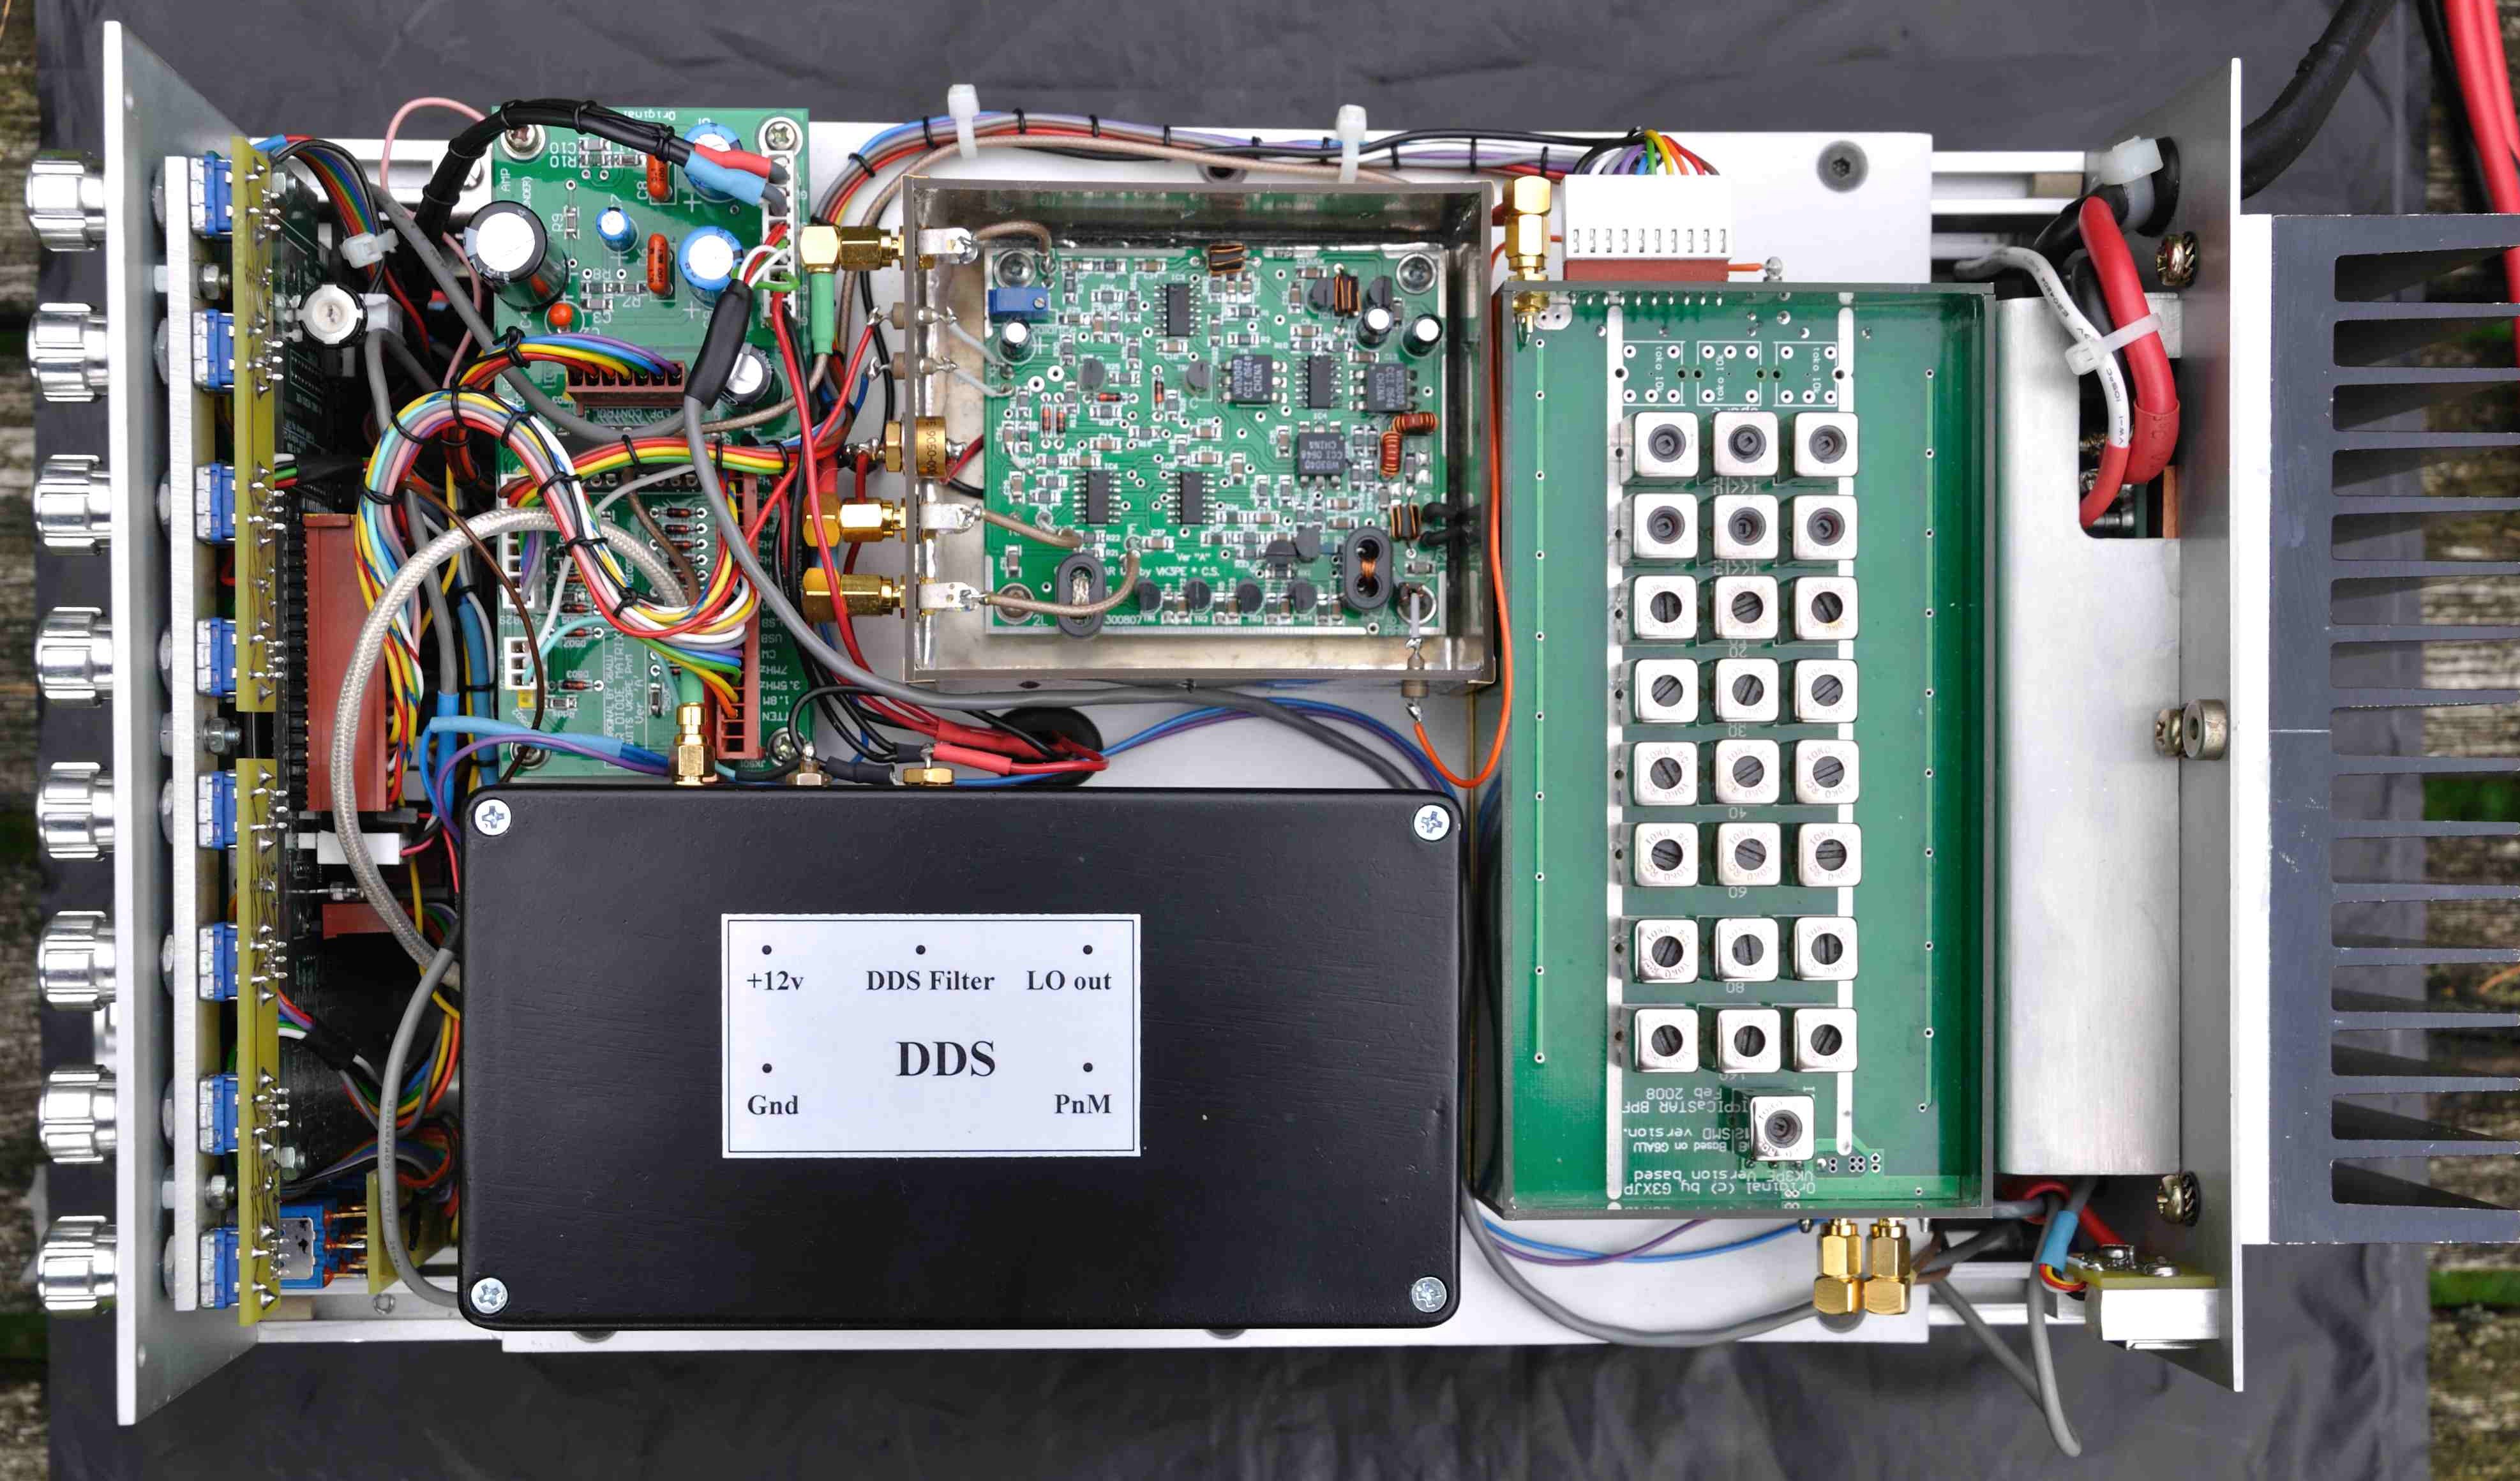
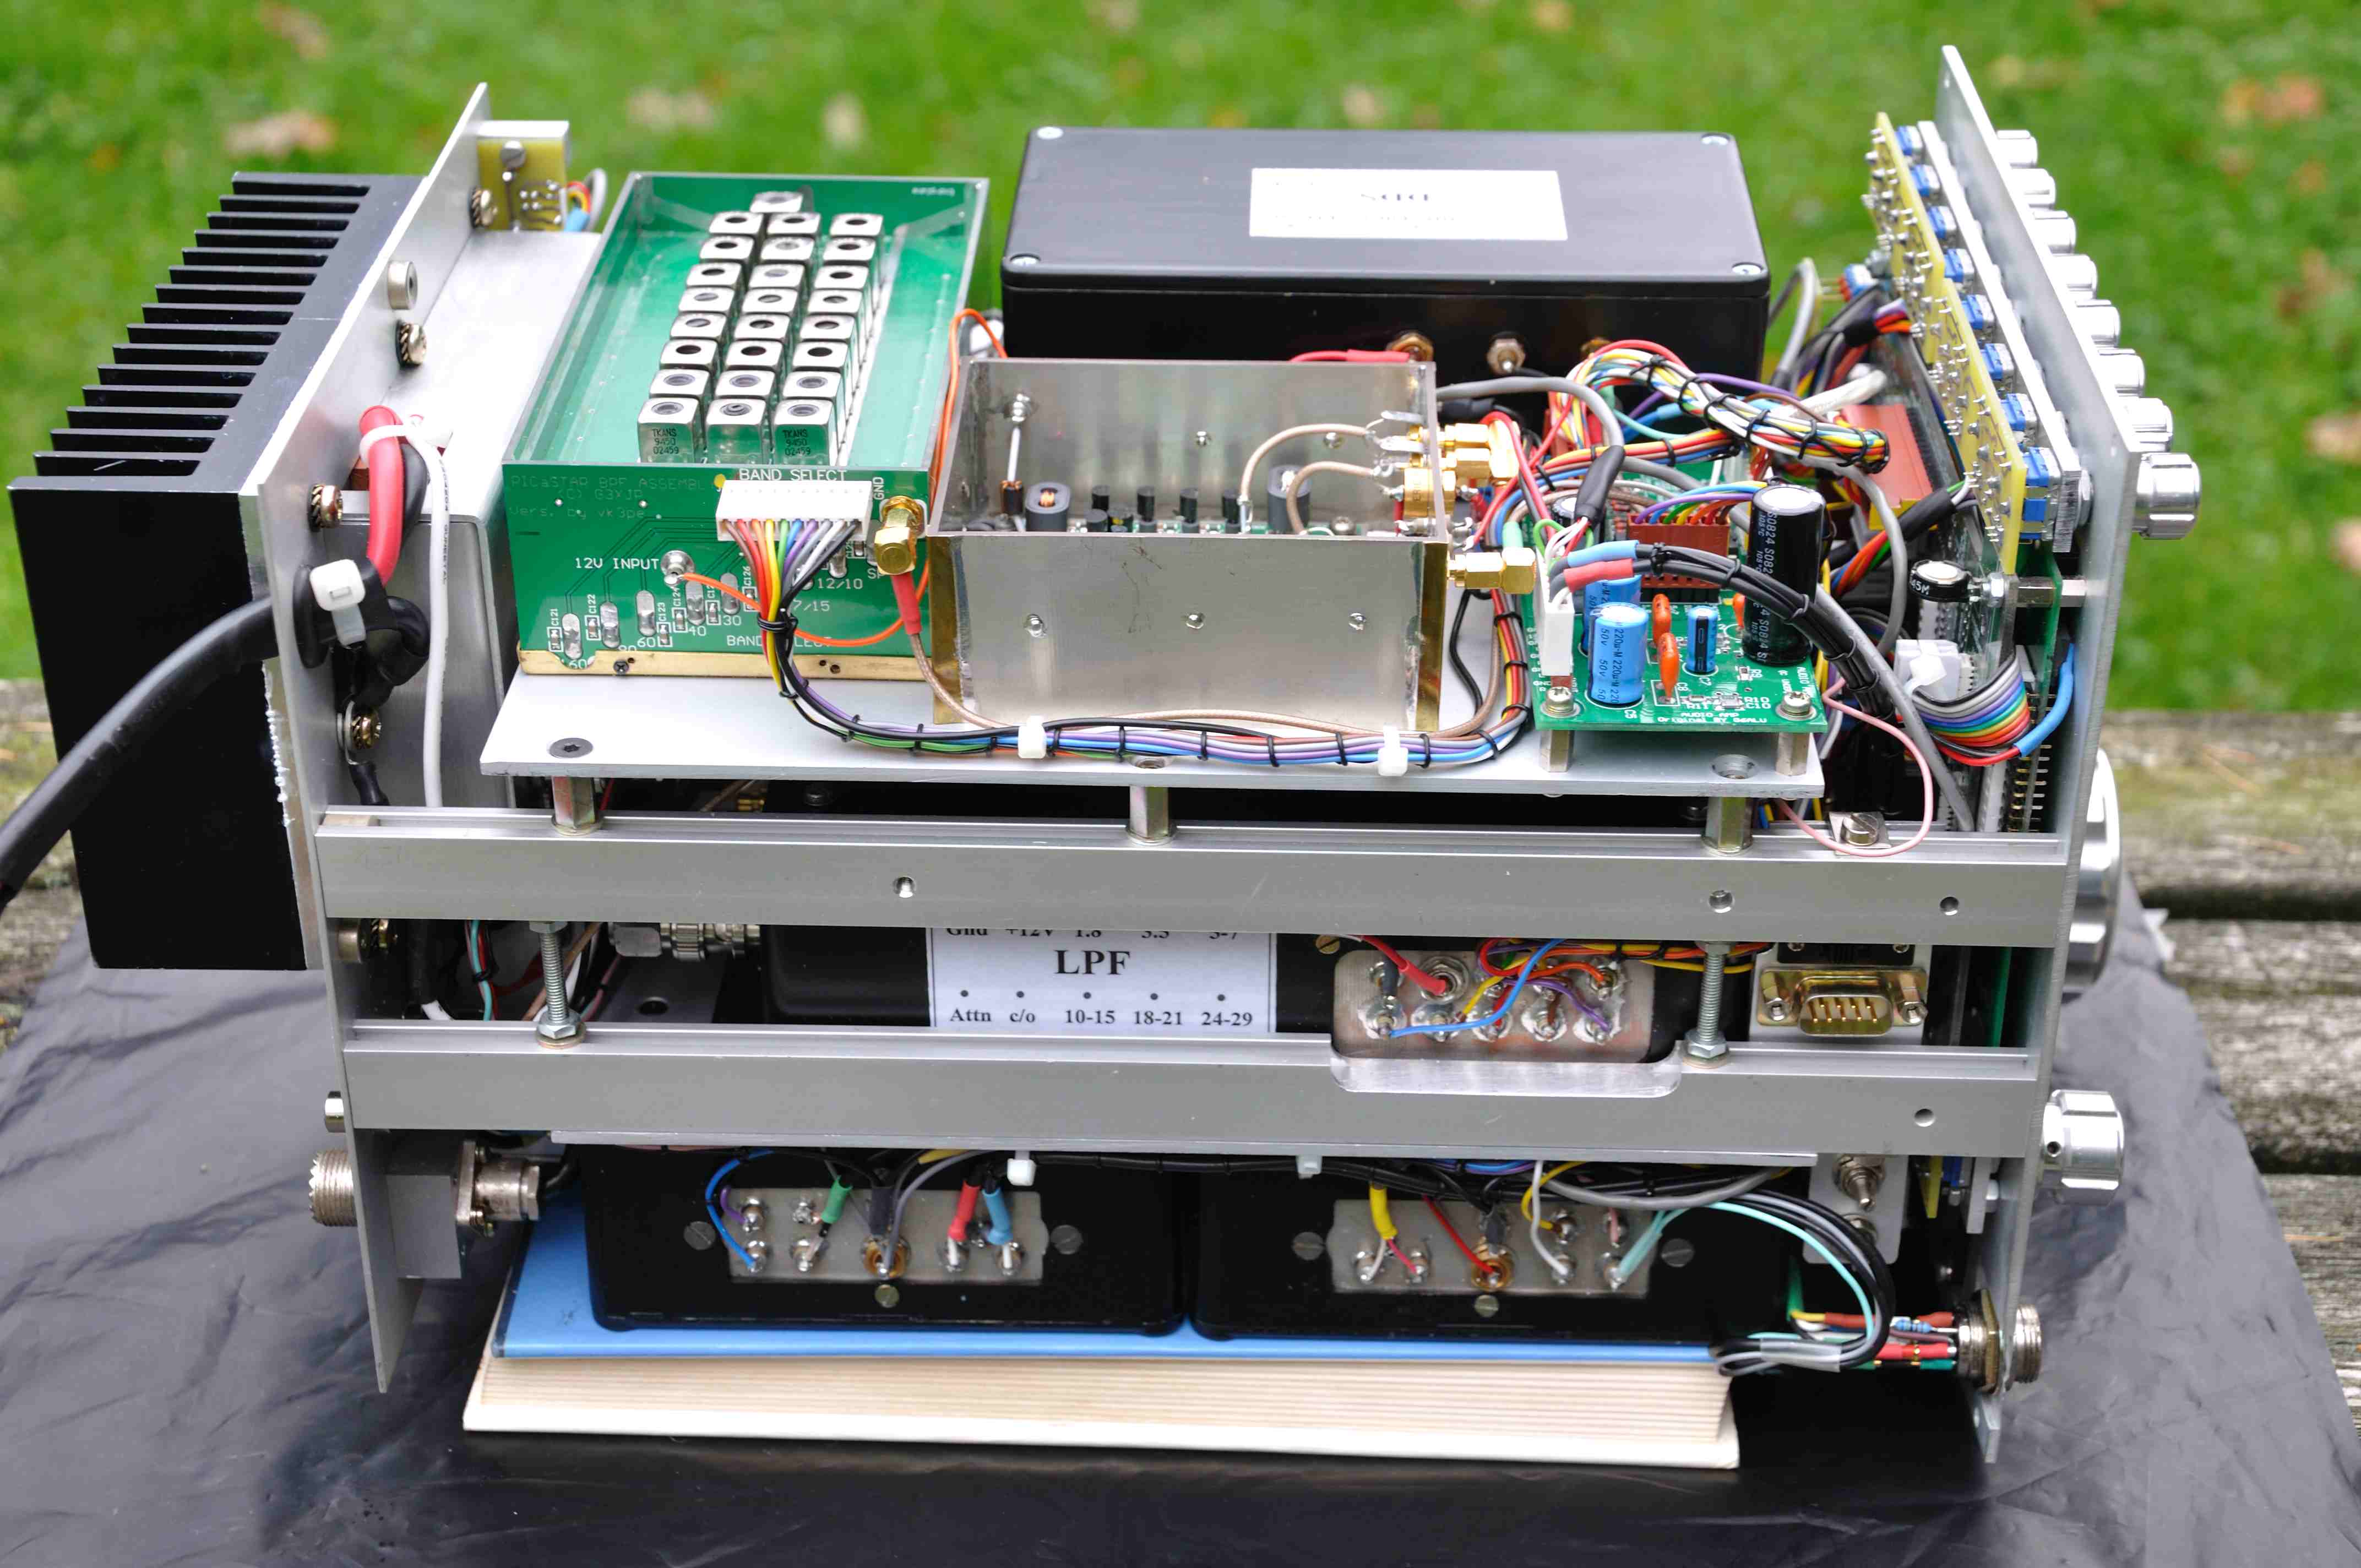
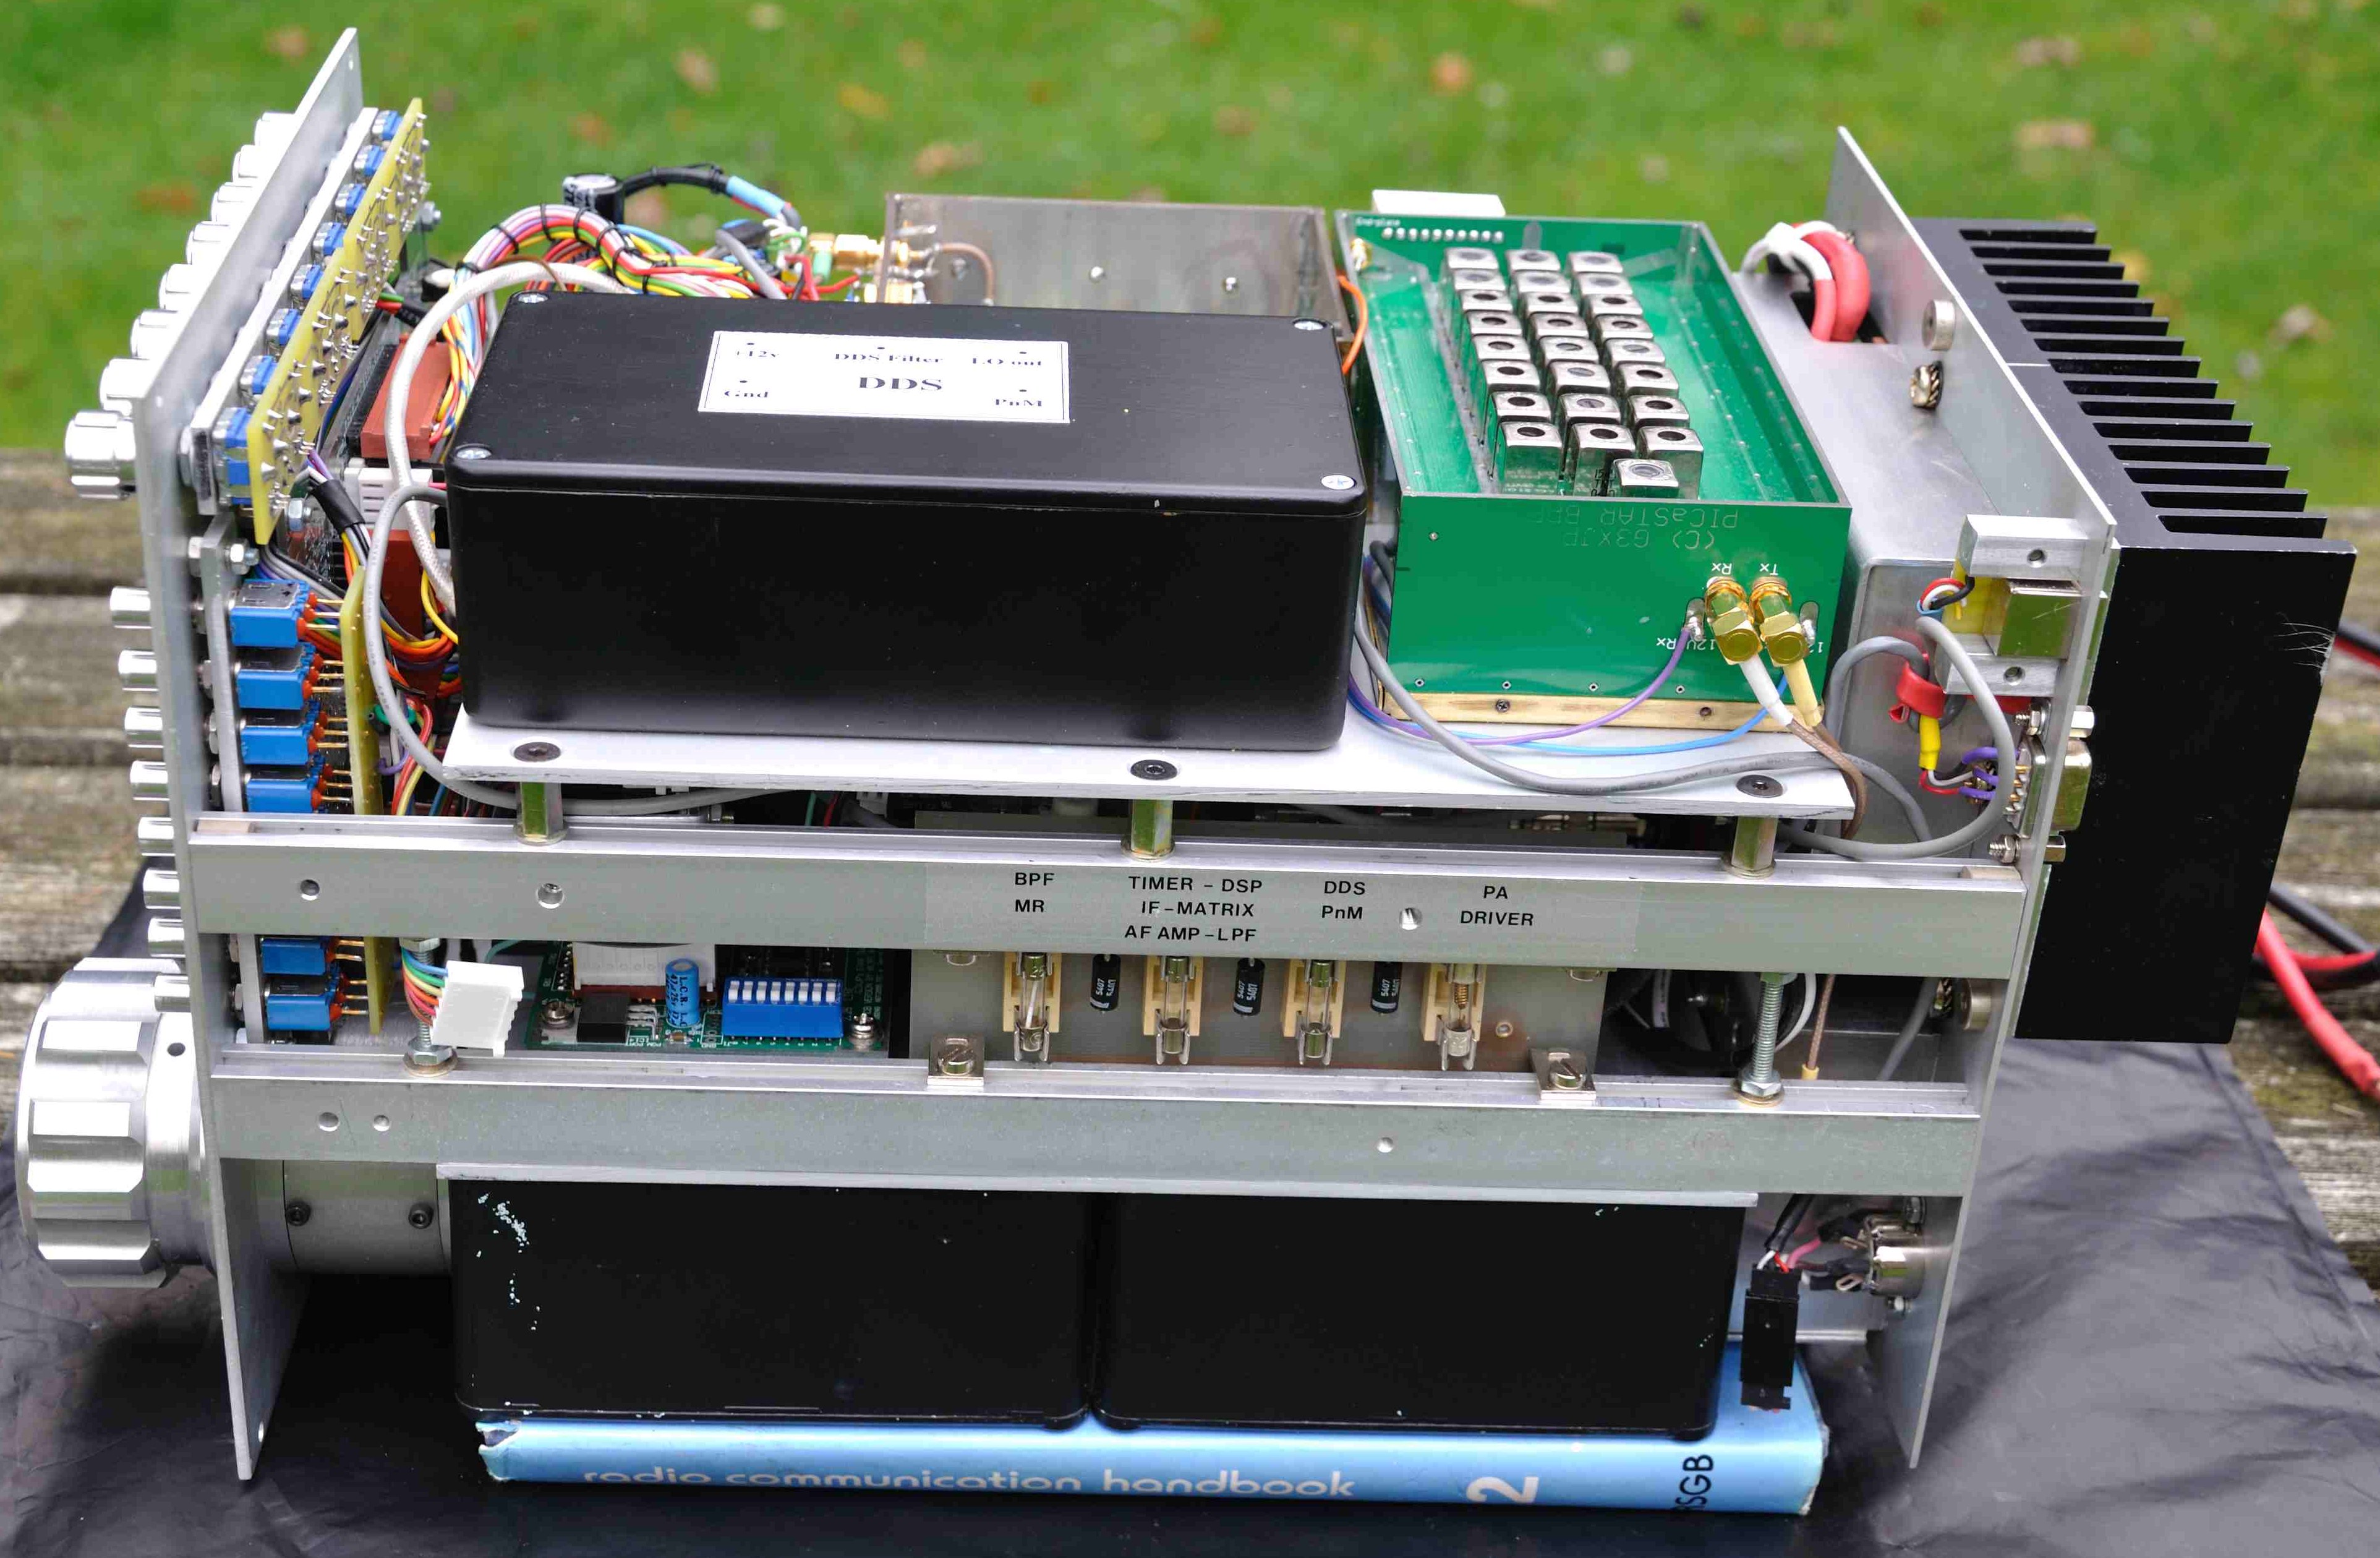
Integration of TRXAVR into Paul's PICaSTAR
NOV 2009: Update pictures of package above. Paul has now machined up his own knobs for the encoders and switches, to match his tuning knob (also home made)
I am unsure of the exact size of Paul's case but it's (nicely) packed into there. Paul has also added Ian's SWR board. (PIcture below)
< Click for larger pictures >